Wild Render: How to Make Deer Tallow
Being good stewards of the land and our resources is an important part of our off-grid lifestyle. As an avid hunter, Philip works hard to provide meat for our family each year. Before our move to the homestead, we were limited not only by space of what we could transport for processing but also limited by the laws of what we could transport. After a successful hunting season in our first year living full-time on the homestead, we’re endeavoring to preserve even more of the usable portions of each harvest. This year in addition to saving organ meats and bones, Philip also saved as much of the animal fat as he could. I was thrilled when I learned that venison fat produces tallow, it’s perfect for soapmaking and tallow balm! Rendering deer fat is a simple process that makes perishable wild game fat into a shelf-stable final product that has multiple uses on the homestead.
What is Tallow?
For decades, animal fats have gotten a bad reputation in our society. As a result, a lot of people (including myself) are unfamiliar with natural fats and find the use of lard and tallow a difficult transition.
Tallow by definition is the fat from hoofed ruminant animals. Most people are familiar with beef tallow. However, tallow includes rendered fat from sheep, goats, deer, and bison. Many people use tallow in cooking. In the United States, a large hamburger franchise made their french fries in beef tallow up until the 1990’s. In other countries, the use of tallow for cooking as well as unrendered suet is still popular.
Three Kinds of Fat
Deer and other ruminants have three kinds of fat. The fat found inside the body cavity, typically around the kidneys and loins is called suet. Suet fat is very hard, crumbly fat that is rich in nutrients and has a high smoke point. This fat renders cleanest with little odor. Once cool, it is solid at room temperature. Suet is highly coveted by soap makers and for cosmetic uses.

The subcutaneous fat on the outside of the animal carcass is often also commonly referred to as suet, however, the subcutaneous fat, also called backfat or trim fat is different. While both kinds of fat can be rendered into tallow, tallow made from exclusively trim fat will be softer. It’s more commonly used in cooking and will retain a more meaty smell than suet.
Some people prefer to exclude the backfat when rendering tallow, using only the true suet fat found in the body cavity. However, to best use our resources, I include both kinds of fat in my tallow.
The third kind of fat is caul fat. This fat is a lacy webbing of fat that surrounds the organs. It is often used in more traditional meat preservation methods and can be used to wrap meat for additional flavor.
Not sure how to use tallow?
Check out these practical and creative ways to use deer tallow in your home and homestead.
Two Methods for the Rendering Process
When rendering tallow, there are two methods, the wet rendering method and the dry rendering method. The two methods are similar, the main difference is the addition of water to the rendering process.
My end goal for venison tallow is to create a clean product appropriate for soap making and tallow balm. For this reason, I chose the wet rendering method to begin my tallow-making. The use of water as well as the addition of salt, helps draw the impurities out of the tallow to create the cleanest fat possible.
Tallow Rendering Prep
Before rendering tallow trim as much meat as possible off of the fat. Once the fat is clean, dice the chosen fat into small pieces. Some butchers will run the fat through a commercial grinding machine if you request it when processing. If you have your own grinder, you can use that to grind the fat before rendering. Be aware that fat leaves a lot of residue in the grinder. The fat will coat all parts of the grinder and can be cumbersome to clean. Since I rendered small amounts of fat, I found that simply dicing the fat into small pieces is easy enough and much easier to clean up.

The other benefit of hand dicing the fat is you will be more aware of any glands in the fat. The glands can be found in large sections of fat and need to be carefully removed from the fat before rendering.


Wet-Rendering Method
As the name implies, wet rendering uses water to render the fat. The biggest advantage of using a wet rendering method is that you will be less likely to burn the fat, as the water will ensure that the fat is evenly heated. Small batches of tallow can be rendered in a crockpot or slow cooker. Larger batches can be rendered in a roasting oven. If you prefer, you can simply render tallow on the stove in a heavy bottomed pan.
To wet render the tallow, add the pieces of fat to the pot. If you choose to use salt to help draw the impurities out of the fat, dissolve the salt in warm water before adding it to the pot. I added one tablespoon of salt per pound of fat that I was rendering. Salt is optional, and not required for rendering. Add water to the bottom of the pot. I added enough water to the pan so that the fat was partially submerged in water.
Low and Slow
Rendering is a long process. Cook the fat slowly starting at medium heat bringing the pot to a simmer. Once the pot simmers, reduce the heat to a low heat to maintain a simmer. As the water heats up, the fat will begin to melt. As the fat melts, it separates from any remaining protein or meat in the suet as well as any connective tissue. The liquid fat will remain on top, while the remaining particles will sink. Continue rendering until all the white fat or translucent-looking fat is completely gone, leaving only melted fat and bits of meat or cracklings at the bottom.

Separating the Fat
Once the fat is completely rendered, strain the liquid through a fine mesh strainer. A metal strainer is best to withstand the heat of the tallow. The first time you strain the fat, a filter will quickly become clogged (ask me how I know). It’s easiest to strain the tallow of the large particles first and then strain through a fine-mesh sieve like cheese cloth or filter on subsequent strainings.

After the tallow is strained, leave the tallow at room temperature and allow the tallow to cool naturally. The fat and water will separate. The water will collect at the bottom of the pan and the fat layer will float on the top. Leave the tallow to cool completely. The tallow is a white color when cool.
Once cool remove the fat layer. The salt and any impurities will be on the bottom of the tallow. Scrape off the impurities and salt. If the fat is pretty clean and depending on how you plan to use your tallow, a single rendering may be sufficient.
Dry Rendering
Rendering deer fat using a dry rendering process is very similar to wet rendering except that you will need to carefully monitor the heat to prevent the tallow from burning. Some people prefer dry rendering as any water added to the tallow needs to be completely removed to store the tallow at room temperature. Dry-rendered tallow may have more of a meaty smell to it. Depending on your end goal, such as using the tallow for cooking, the slight odor may not be a concern.
To dry render, add the solid fat to a heavy bottom stock pan. Salt is not used when dry rendering tallow. Heat on low to medium heat, stirring frequently and scraping the bottom to ensure that the fat does not burn. Once the fat begins to render, the liquid fat in the bottom of the pan will help to distribute the heat more evenly. Simmer the tallow until only liquid tallow remains. You may also see bits of meat and connective tissue in the bottom of the pan. Leave the lid off or at least cracked to allow all moisture to escape the pot. If there is any water or moisture in the tallow, you will see bubbles as the tallow simmers. When the tallow stops bubbling when at a simmer, the water has been evaporated out of the fat.
If you loved this project, you’ll love these projects too:


Did you render tallow?
We would love to see what you have created so mention us @kowalski.mountain or tag us using #kowalskimountain so we can see your creations!
Straining the Tallow
Once completely rendered, strain the tallow as described above and allow it to naturally cool. While dry-rendered tallow should not contain much water when properly rendered, there may be a layer of collagen and impurities at the bottom of the pot. Wash the collagen off the bottom of the tallow and scrape off any impurities. To get the cleanest fat, melt the tallow once more, and strain through a fine filter. Tallow can be stored in mason jars or poured into molds.
Storing Tallow Long Term
Once rendered, tallow is shelf stable at room temperature but must be free of any moisture. Otherwise, the tallow may mold. This is one of the biggest reasons some people choose to dry render their tallow, to ensure there is no moisture for long term storage. Be sure the tallow is stored in an air-tight container. Tallow can also be stored in the refrigerator or freezer for an indefinite length of time. If you are concerned that your tallow may have moisture in it, storing the tallow in the freezer is best.

Find this post helpful?
Share it on Pinterest
My Rendering Process
Once the tallow has been initially rendered, you may want to render it more than once to completely remove any impurities. Since I was rendering tallow for soap making, I chose to wet render my tallow twice. On the second render, I broke the solid tallow into pieces, added fresh water and salt in the same quantities as the first render. Once the tallow was completely melted, I rendered the fat for an additional hour keeping the tallow at a simmer. Once complete, I strained the tallow again. Using a fine strainer or filter works best at this time. Allow the tallow to cool naturally again. Tallow can be rendered as many times as you choose. Some people who use tallow for cosmetic purposes may render the tallow more than a half dozen times.

Finishing Render
Since I wanted to store my tallow at room temperature, I finished my tallow with a dry rendering process. Once the fat layer has solidified again, scrape the salt and any impurities off the bottom of the tallow cake. To ensure my tallow did not burn, I chose to use a double boiler to heat the tallow indirectly. While I don’t own a double boiler large enough for the tallow on hand, I used a large cast iron pot and added a shallow rack to the bottom. I placed my large stock pot in the skillet. Then I added enough water to fill the cast iron pan about 3/4 full. It has to be full enough to boil, but not so full to boil over. Add water as necessary to maintain the water level.


Once the tallow completely melts render until no bubbles remain. Leave the lid off to allow all moisture to evaporate as the tallow renders.
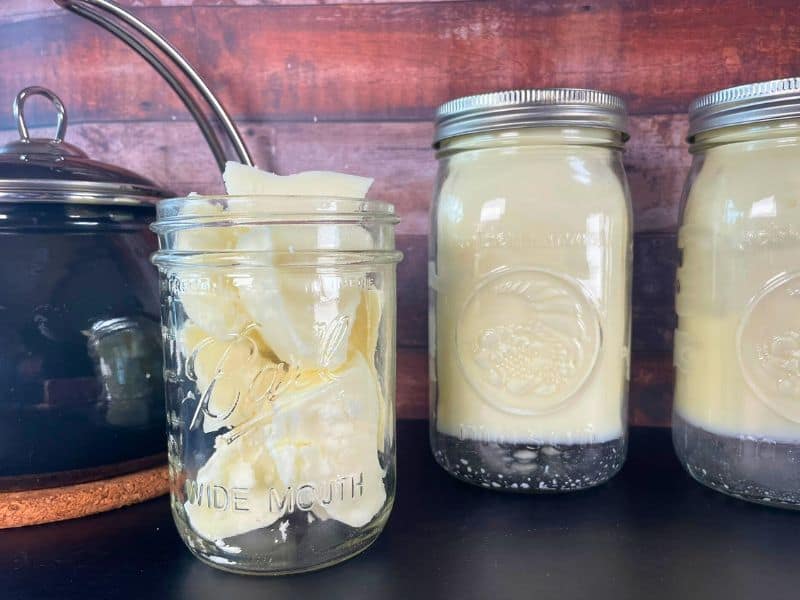
My Storage Choice
Once complete, pour the tallow into mason jars or molds. While I wanted to make blocks of tallow rather than use mason jars to store tallow, I did not want to have to store the tallow in the freezer. I opted to use wide-mouth quart mason jars. Once I filled the jars, I used a new canning lid and secured the ring tightly. Then I inverted the jars to allow them to cool. Be sure to protect the surface you are cooling the jars on from heat as the jars will be very hot when first filled.

Moisture Free Tallow
Once the jars were cooled, I turned the jars upright and checked each jar for moisture. Since fat will rise to the surface, any remaining water will be at the lid of the jar when cooled in an inverted jar. I was thrilled to open the lids to find completely dry lids on all but one jar. Only the last jar I filled had any moisture. That indicates I should have dry rendered a bit longer, however since only the final jar had any moisture I am confident that the remaining jars are sufficiently rendered to remain shelf stable. If you are not sure if the tallow is completely free of moisture, you can dry render again or store the tallow in the refrigerator or freezer.
The latest on Youtube:
Uses for Deer Tallow
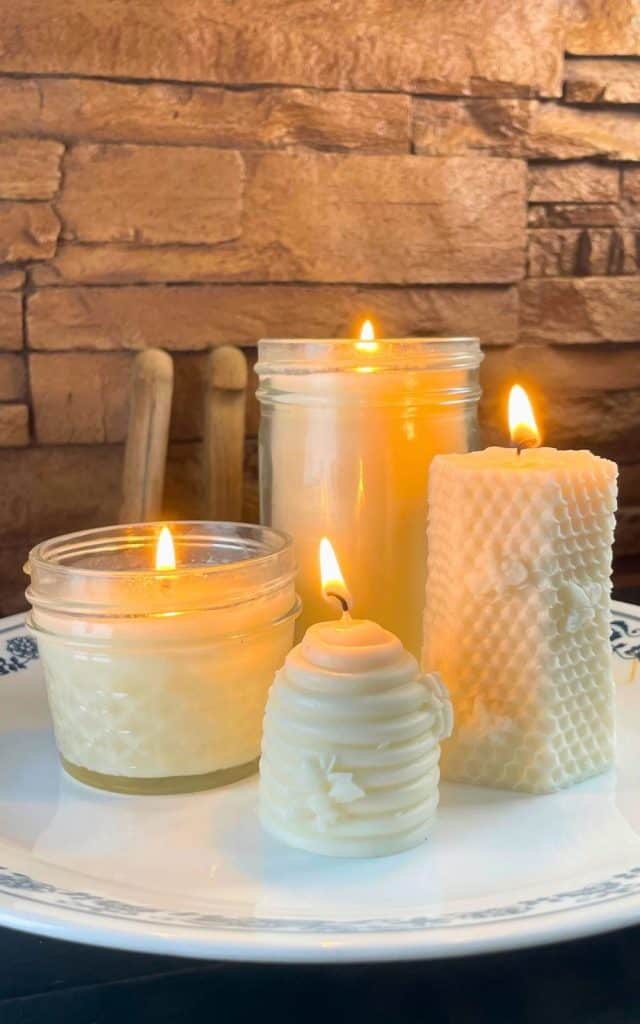
Tallow is great for cooking. I used tallow to make dumplings with no off-scent or taste. My main purpose for rendering deer fat is to make tallow soaps and tallow balms.

About the Author: Barbra-Sue Kowalski grew up on a small hobby farm. She was always drawn to farm life, however, she was stuck in an urban life far from her roots. Barbra-Sue was a single mom for 13 years, raising her 3 children on her own. She met Philip in 2018 and they married in 2021. Between the two of them, they have 5 grown children and 7 grandchildren. These empty nesters are following their dreams! As they both turn 50, they are building their off-grid homestead to live the life that they dream about. Learn more about Philip and Barbra-Sue here. Contact them here. To leave a comment on this post, please scroll down.


Loved this explanation! That’s for being so specific and adding pictures. Can’t wait to try this!
Hope it works well for you. I am dry rendering lard today!
When you are done grinding run a lemon rind an all, clean up is easy
This is an amazing idea! Thank you for sharing.
Thank you so much for this detailed description! Can’t wait to try it
I hope it goes well! Appreciate you stopping by.