How to Make Homemade Amish Velveeta Cheese from Raw Milk

Have you ever wished you could enjoy that creamy, melty texture of store-bought Velveeta cheese but without all the processed ingredients? This recipe for homemade Velveeta cheese from raw milk offers a healthier alternative to a classic favorite. It uses just a handful of simple ingredients that you may already have in your pantry. This kind of cheese reminds me of American cheese and is perfect for everything from casseroles to sandwiches. While I use raw milk for this recipe, you can use store-bought milk if you are looking for a homemade alternative to store-bought cheese products without owning a dairy animal.
Straight from the Source
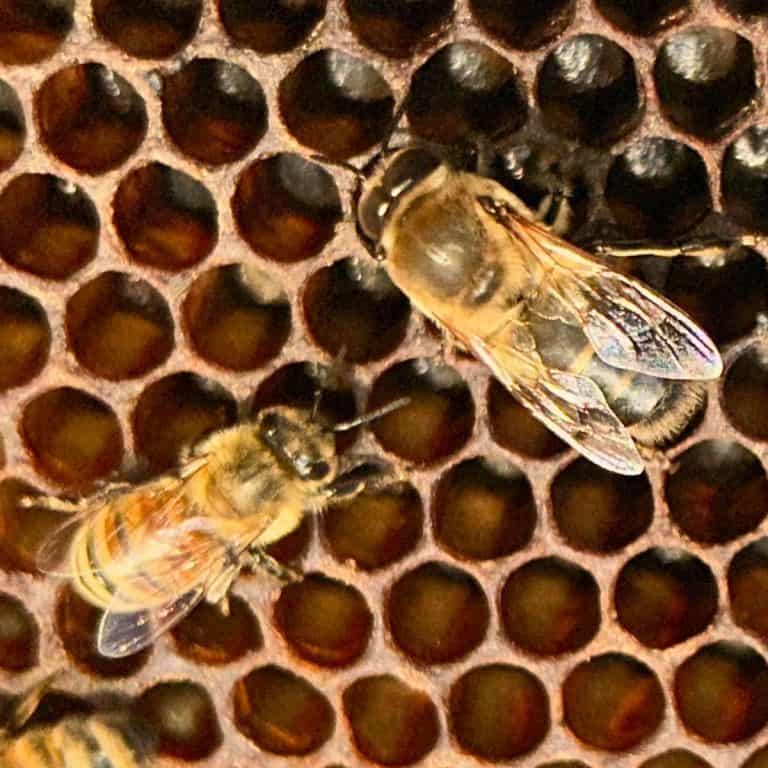
Here at Kowalski Mountain, we live in the heart of the Amish community of our county. For years, even before we made the permanent move to the homestead, we were building a relationship with some of the Amish business owners in our community. In the years preceding our move, several Amish families moved onto our country road. Shortly after arriving, I shared a bottle of honey with each neighbor, extending the olive branch of friendship. I was delighted to be invited into their homes and introduced to their families.
Recently, while purchasing seed starts from an Amish neighbor, I asked her about cheesemaking. In my community, I don’t know many cheesemakers, but if anyone would know, I was hoping our Amish friends could help. Interestingly, my neighbors don’t make some of the common cheeses that I expected. However, all of them make Velveeta. I was even more surprised to learn that this is the cheese used on pizza.
Surprising Ingredients
This type of cheese is made in a very different manner from the cheeses I have been making. While it does use some common ingredients, it also uses some ingredients that surprised me.

Ingredients you’ll need for this recipe
How to Make Homemade Velveeta Cheese from Raw Milk: Step-By-Step Guide
Step One:
First, measure a half cup of cold water and stir in 3 teaspoons of citric acid. Stir well and make sure that the citric acid is completely dissolved before adding it to the milk.
Step Two:
Meanwhile, in a heavy-bottomed pot, heat the milk to 140 degrees. When heating milk, I don’t find it necessary to use a double boiler; however, a heavy-bottomed pot is essential. This ensures the milk will not scorch. I typically heat my milk on medium heat and stir on occasion while heating. I stir my milk not only in a circular motion, but also in an up and down motion to ensure the heated milk at the bottom of the pot mixes with the cooler milk at the top of the pot.

Step Three:
While the milk is heating, prepare the draining setup. I use a large pot that my colander fits in. It rests on the edges well and allows the whey to drain. Line the colander with a piece of butter muslin or cheesecloth.

Step Four:
Prepare your cheese mold or small loaf pan. When using one gallon of milk, I have a mini loaf pan that holds just 11 ounces of batter; this is the perfect size to make a rectangular loaf of sliceable cheese. To prepare the mold, grease the mold well with butter. Be sure to grease the corners and sides well to make it easier to remove the cheese.

Step Five:
Once the milk reaches 140 degrees, turn off the heat and stir the citric acid solution into the milk, stirring in both a circular and up-and-down motion to distribute the solution. Once done stirring, I use my spoon to slow the swirl and allow the milk to rest for 5 minutes.
Step Six:
Once the curds and whey separate, use the straining setup to pour off the whey.
Step Seven:
After the curds have mostly drained, use a rocking motion with the butter muslin to drain any remaining whey out of the curds. To strain it off gently, grab opposite corners of the cheesecloth and rock the curd back and forth. Then switch to the opposite two corners, rocking the mass of curds back and forth. I do this for just a few minutes; I don’t want an excessively dry curd.
 Step 5: Adding Citric Acid
- Separated curds and whey
- Step 6: Pour off whey
- Step 7: Roll curds in butter muslin
- Step 8: Return curds to pot with melted butter. Add salt, baking soda and cheese powder.
- Step 8: Begin melting curds.


Step Eight:
Begin to melt the butter in the same stockpot that you used to heat the milk over medium heat. Return the curds to the pot. Add the additional ingredients: baking soda, salt, and cheddar cheese powder, if you are choosing to use it. Begin stirring to melt the curds completely. This step requires constant stirring to ensure you don’t scorch the cheese. The curds may puff up, just keep stirring!
TIP: I typically add the cheese curds to the pot in a mass, but you can break the curds up with your hands to help them melt more quickly.


Rubber Scraper and Spatula
I only use Papmered Chef rubber spatulas because they are heat resistant. I can leave it in the pan and NOT melt it!
This large scrape and stir spatula is perfect for stirring the cheese for the melting process.
Step Nine:
Once the cheese is completely melted, pour the cheese into your prepared mold. The cheese will be thick, not pourable. Once the mold is filled, cover the mold with a piece of plastic wrap and chill in the fridge.


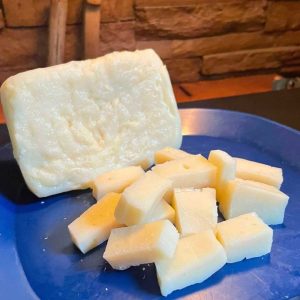
Amish Velveeta Cheese
Equipment
- 1 heavy-bottomed stockpot
- 1 cheese thermometer
- 1 butter muslin (or cheesecloth)
- 1 straining bowl and colander
- 1 small container for finished cheese
Ingredients
- 1 gallon milk We use raw milk.
- 3 tsp citric acid
- ½ cup water
- ¾ tsp baking soda
- 1 ½ tsp salt
- 1 tbsp butter
- ½ tbsp cheddar cheese powder (optional)
Instructions
- Mix citric acid in water and stir until dissolved.
- In a heavy-bottomed pot, heat milk to 140℉, stirring on occasion. Turn off heat when you reach 140℉.
- Line colander with sterilized butter muslin, place colander into a draining container.
- Prepare a cheesemold or small container for finishing cheese. Grease with butter, making sure to grease the corners and sides well.
- Add citric acid solution to heated milk, and stir in gently. Allow to sit for 5 minutes.
- Using the butter muslin setup, drain off whey.
- Once drained, grab the opposite corner of the butter muslin, rolling the cheese in the colander to drain off excess whey. Repeat using the additional opposite corners. Cheese will form a soft ball.
- Melt butter in the same heavy-bottomed pot.
- Transfer the cheese back to the heavy-bottomed pot.
- Add baking soda and salt. If using cheddar cheese powder, add now. Begin mixing.
- Melt cheese on medium heat until completely melted, stirring constantly. Cheese may puff up, keep stirring until completely melted.
- Once melted, pour cheese into prepared mold and chill.
- Once chilled, remove from mold and enjoy.
Video
Nutrition
How to make Amish Velveeta Cheese
I was so excited about this cheese, I recorded a video the second time I made it! I’ve learned a little since then, still this will take you through the process to make it yourself.
You can find more video tutorials on our Youtube Channel
Using Your Own Velveeta
We enjoy homemade Velveeta for snacking. This is a very mild-tasting smooth cheese that I feel tastes similar to a popular individually wrapped, sliced, cheese-like product used for sandwiches. Cut it into cubes to eat as a snack. Slice it as thin as possible for grilled cheese sandwiches. It melts best when in very thin slices rather than a thick slice of cheese. I also cook my grilled cheese sandwich on a low heat and then increase the heat to toast the sandwich after the cheese begins to melt nicely.


Crockpot Velveeta Queso
This easy crockpot queso has been a family favorite for years! While I haven’t been a fan of the yellow block for quite some time, I would purchase it on occasion just to make this! Not anymore! My Amish Velveeta cheese melted beautifully to make this delicious crowd pleasing appetizer (or dinner)!

Free Download
Get my One Pot Mac & Cheese recipe in the Kowalski Mountain Subscriber’s Library!
This cheese makes delicious macaroni and cheese. I usually mix it with a little bit of cheddar for flavor, but it melts smoothly and tastes amazing!
Find it in the recipe section under Side Dishes.
Not a member? Join here!
Answers to your questions about making homemade Velveeta from raw milk
Can I Double the Recipe?
Of course, however, I like to stick to the gallon batch recipe because the melting uses quite a bit of muscle! Making this cheese made me realize I never want to arm wrestle my Amish neighbors!
Are butter muslin and cheesecloth the same?
Essentially yes, but butter muslin typically has a higher weave. Butter muslin has a thread count of 90 threads per inch. Cheesecloth comes in grades. Some are comparable to butter muslin, but if you have ever bought cheesecloth in the grocery store, you will know they are not the same. Cheesecloth can come in weaves with a thread count of 10 threads per inch to 100 threads per inch. Cheesecloth with a looser weave may need multiple layers, and while it’s washable, it will not stand up as well.
How’s the best way to clean my stockpot?
This recipe leaves melted cheese on the bottom of your stock pot. I have found the best way to clean the pot is to use cool water, slightly warm, but still cool. Scrap the cheese off with a scraper. Hot water will melt the cheese, but it makes for messy residue in your sink and strainer.
Did you make this recipe?
Mention us @kowalski.mountain or tag us using #kowalskimountain so we can see your creations! You can also leave a comment below!

Find this post helpful?
Share it on Pinterest

About the Author: Barbra-Sue Kowalski grew up on a small hobby farm. She was always drawn to farm life, however, she was stuck in an urban life far from her roots. Barbra-Sue was a single mom for 13 years, raising her 3 children on her own. She met Philip in 2018 and they married in 2021. Between the two of them, they have 5 grown children and 7 grandchildren. These empty nesters are following their dreams! As they both turn 50, they are building their off-grid homestead to live the life that they dream about. Learn more about Philip and Barbra-Sue here. Contact them here. To leave a comment on this post, please scroll down.


This recipe is so easy to make! No special equipment, basic ingredients! So much better for you! We love it on grilled cheese sandwiches and mac and cheese!
Loved this recipe! May I ask what you use the remaining liquid/whey for after finishing off the cheese log? I presume it wouldn’t work for ricotta or similar given the baking soda content?
I’m so glad you enjoyed it. There is a way to use the whey after you’ve made cheese with citric acid but I am not familiar with the method. We typically use whey in our garden or feed to our pigs and chickens. I’m sorry I can’t be more helpful.
Your cheeses is good. I have been making cheeses off and on since 1978. I keep the whey and heat it to 195-100 degrees as per the Mother Earth recipe for 2 cheeses (Mozzarella/Ricotta) from 1 gal of milk.
I have never had good success from the mozzarella cheese, theirs or any other recipe. That heating and kneading method does not work for me. I can grate the hard as a rock cheese and use it but it is not great.
But the Ricotta was always perfect. i ate maybe half of it before I put it in the fridge.
I love hearing this! I need to try making ricotta from whey. I always make it from whole milk and I don’t love it. Thanks for stopping by!