Beginner’s Guide: How To Mill Flour At Home With Fresh Grain
Years ago, when I started my fresh-milled flour adventure, we started from a preparedness standpoint. The pandemic had shown us that the food system could break down much faster than we might have thought. Never in my life had I seen empty grocery store shelves. I had known about milling my own flour at home for over a decade, but even then, I didn’t fully comprehend the nutritional difference that fresh-ground flour would bring to my table. As an experienced baker, I jumped in, never anticipating that I was learning a new skill that would take practice and perseverance to master. Regardless of the challenge, learning how to mill flour at home is worth the effort! Once you experience the difference that fresh-milled flour brings, you’ll never look back! In this beginner’s guide, you’ll learn the basics of the milling process and everything you need to know as you begin this exciting new journey.
Why Mill Your Own Flour at Home?
While people have a variety of reasons for switching from store-bought flour to fresh milled flour, the top reasons are nutrition, food concerns, health reasons, and preparedness.
Nutritional Benefits of Freshly Milled Flour
Coming from a family that valued from-scratch cooking, I never considered that my home-cooked meals were not the most nutritious way to feed my family. For the sake of shelf life and profit, staple ingredients have shifted from lightly processed and preserved whole foods to ultra-processed products. The basic nutritional value of these simple staple ingredients had been silently changing.
White flour, like other staples, had been changing too. In the fresh milled flour community, all-purpose flour is commonly referred to as dead flour. This comparison seems harsh, but as you learn more about the anatomy of wheat, it’s hard to deny that the term is fitting. To create a longer shelf life, the bran and germ are removed from commercial flour. This leaves only the soft, starchy endosperm, which is missing most of the essential nutrients found in whole grains.
Anatomy of a Wheat Berry
A wheat berry is made up of three parts:
Bran: The bran is the outer layer that protects the wheat berry. Only when the wheat is sealed in this protective outer shell is the wheat preserved from oxidation. The bran contains soluble fiber, insoluble fiber, B vitamins, iron, digestive enzymes, and trace minerals.
Germ: the wheat berry is a seed; should it be planted, the germ is the part of the plant that begins to grow. The germ contains essential fatty acids, vitamin E, B vitamins, antioxidants, minerals, and phytonutrients.
Endosperm: The endosperm is what feeds the plant as it begins to grow. The endosperm contains carbohydrates, protein, small amounts of B vitamins, and minerals.

Food Concerns and Health Issues
As more people become concerned about the ingredients found on our food labels, many are turning to whole foods. Milling your own grains ensures you have the most nutrient-dense whole wheat flour possible. Still others experience food sensitivities to ultra-processed foods. While true allergies exist, many with common food sensitivities learn to use alternate flours by substituting ancient grains for modern wheat to find relief and even healing from health issues.
Better Flavor in Baking
I think the most rewarding part of switching from all-purpose flour to fresh whole-grain flour is the rich flavors that different grains bring to your baking. While the flavor of grains can be a stumbling block to people not used to the rustic flavor of the grains, it can transform your baking. For some, this is a lifestyle change that takes time to embrace the flavor. You may find you need to ease your family into the transition, mixing freshly milled flours with all-purpose flour.

Cost Savings and Long-Term Preparedness
When it comes to cost savings, you have to compare the costs apples to apples. Be sure to compare the cost of wheat berries to an organic whole wheat flour, not the cheaper prices of the standard white and blue bags at a local box store. You can read more about my cost breakdown here for a true apples-to-apples comparison.
For us, preparedness was the deciding factor. Wheat can be kept for decades when properly stored. Commercial flour, despite being stripped of the oils that can cause flour to go rancid, will still go bad. Store-bought flour is only good for about one year, making it a poor investment for long-term preparedness.
Word to the Wise
If you are purchasing wheat for long-term preparedness, be sure to take time to use it! Baking with freshly ground flour has a learning curve. As part of your preparedness training, learn to cook with the foods you store.

Find this post helpful?
Share it on Pinterest
The Basics of Milling Grain into Flour
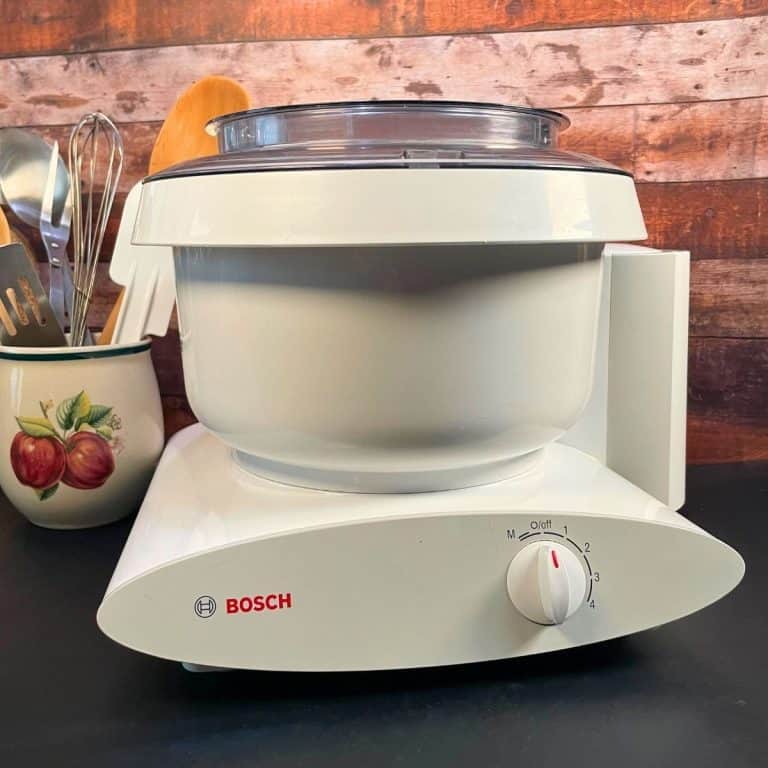
Milling your own flour at home is a far cry from my childhood images of a water-powered stone mill on my favorite TV show. Still, the basics of milling flour are the same. Wheat berries are ground or crushed to pulverize the entire wheat berry into a fine flour. Today’s home bakers can choose from burr mills or high-speed impact mills. Electric mills make home milling flour fast and easy whenever you need it. Burr mills are also available as a manual mill.

While some people use a high-powered blender or even a coffee grinder to pulverize the wheat, I highly recommend purchasing a dedicated grain mill. While a blender can pulverize the wheat, there is no control over the coarseness of the flour. Most people prefer to bake with a fine flour. Additionally, the rough texture of flour milled in this way can be damaging to the gluten development of your bread.
Choosing a Grain Mill
When choosing your first mill, consider your goals for cooking. Will you be using the fresh flour for baking only. Are you interested in coarser ground grains for cream of wheat, cornmeal, or grits? Do you want to mill oily or wet grains? Do you bake a lot, using a large amount of flour at one time? Is aesthetic appeal important to you? And most importantly, what is your budget?
Choosing a Grain Mill: Pros & Cons
Burr Mills
Burr mills have two plates that grind the wheat, one is stationary, while the other rotates, crushing the grain.
Impact Mills
Has a milling chamber with concentric rings of stainless steel teeth that crush the grains at high speeds.

Choosing a Grain Mill for the Homestead
Need more help choosing? Read more about grains mills in this post.
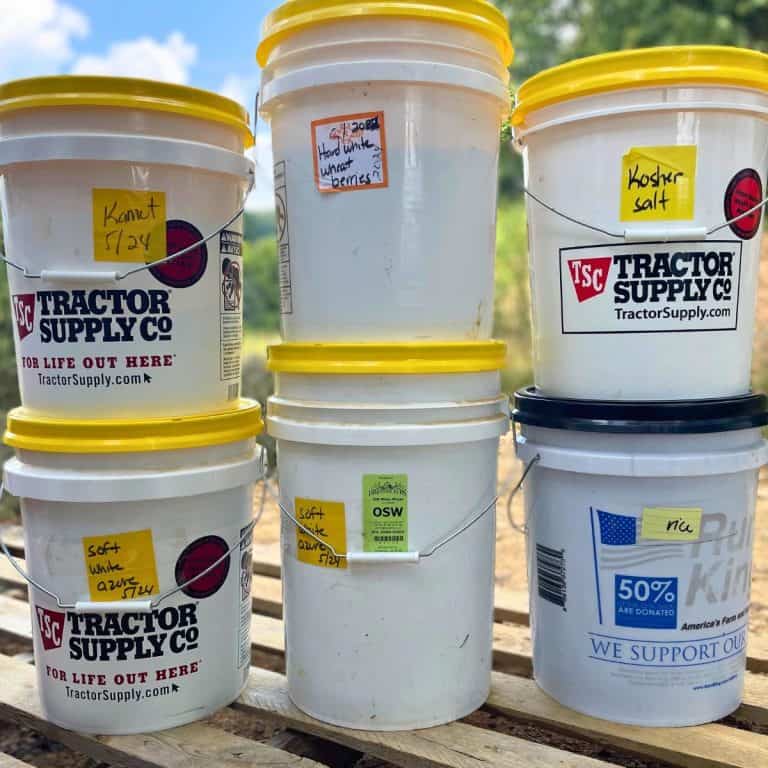
Choosing Grains
When I first started this journey, I had no idea what the array of whole grains would do for my baking. It’s a whole new world of flavor! From modern wheat, ancient grains, and heritage grains, there are so many to choose from! Every baker should start with a basic hard wheat and a soft wheat. Both are available in red and white, though the hard white wheat will have a milder flavor than the hard red wheat. The same is true for soft white wheat. If you are like I was, having used a cheap imitation of whole grain flour my whole life, the flavor and texture can be an adjustment. I suggest the milder white wheat in both varieties. Hard white wheat is an excellent choice for bread making, while soft white wheat is the perfect grain for quick breads and cookies.

Best Whole Grains for Milling
Hard and soft wheat are only the beginning! Learn more about a variety of grains in this post.
Get our FREE Flour Conversion Chart
Quickly determine the amount of wheat berries needed to mill the correct amount of fresh milled flour.
When you join our newsletter
Step-by-Step Guide: How to Mill Flour at Home
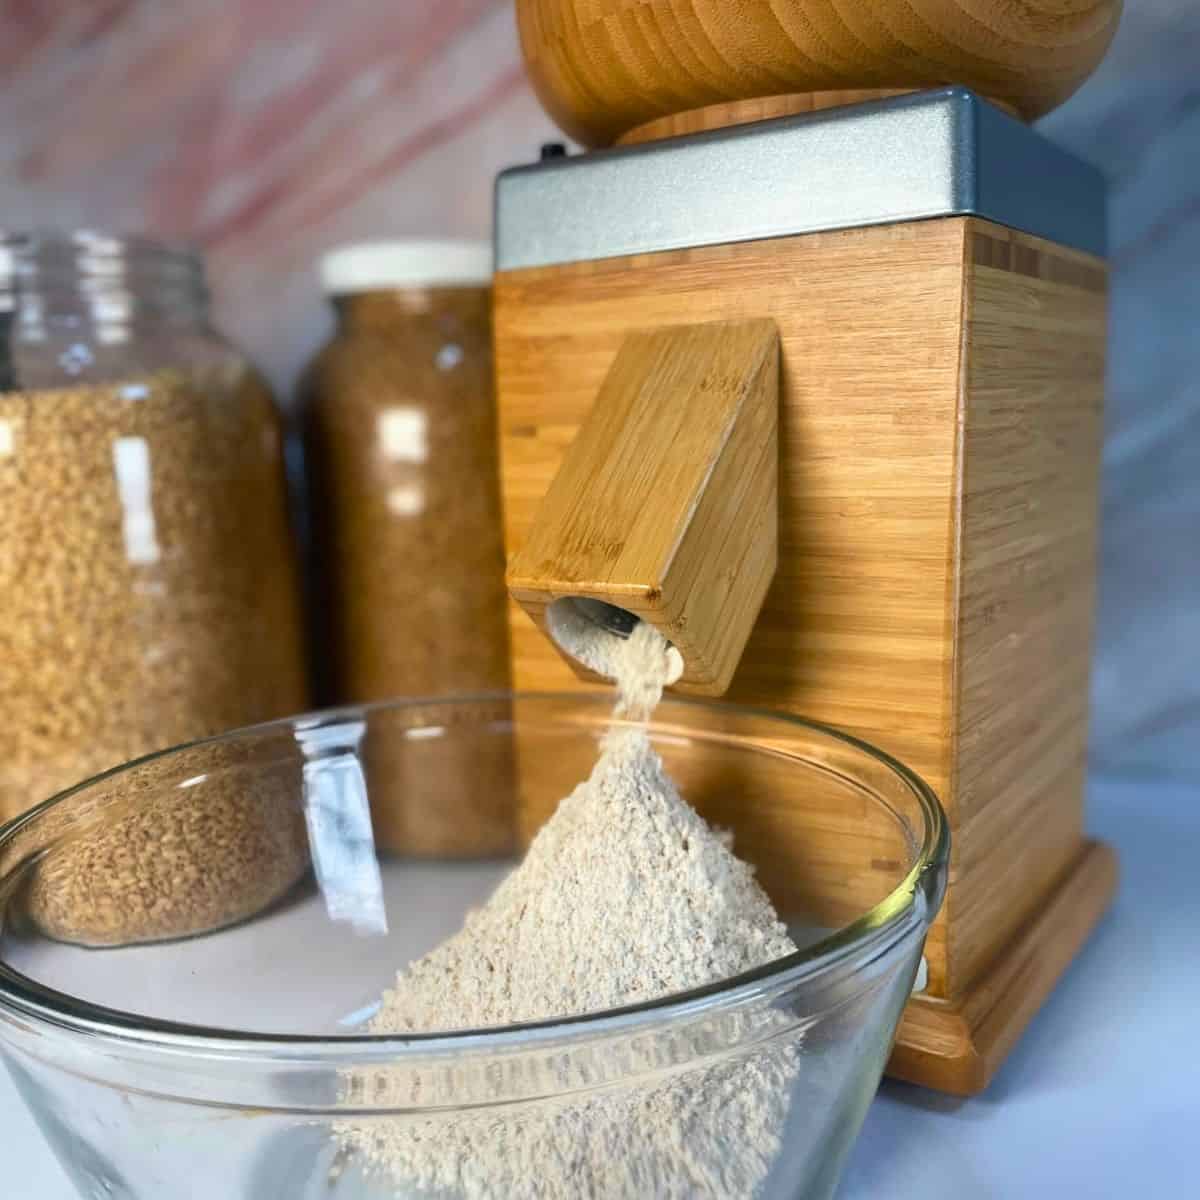
Once you have gathered your grain mill and your basic grains, it’s finally time to mill your fresh flour. But before you do that, take time to run two cups of plain white rice through your grain mill first. Like all appliances assembled in an assembly line, there may be excess oil or debris inside your grain mill. Running rice through on a fine setting will clean the mill so it’s ready for your whole grains. Once the mill is clean, follow these simple steps to mill your fresh ground flour.
Step 1: Select and Measure Your Grain
Most people who use freshly milled flour grind the wheat as needed. Many recipes designed for fresh-milled flour provide measurements of wheat berries in grams.
It’s important to understand that 1 cup of wheat is NOT equal to 1 cup of flour. However 150 grams of wheat DOES equal 150 grams of flour. If a recipe provides a measurement of wheat in grams, measure out the exact amount to mill. If the recipe indicates the volume needed, such as 3 cups of flour, you will need to estimate the amount of grain. Since each grain is slightly different, there is more room for error in this method; however, the rule of thumb is that 2/3 cups of wheat makes 1 cup of flour.

Step 2: Prepare and Adjust Your Grain Mill
Before you fill the grain hopper, be sure to understand the type of grain mill you have. I have two Nutrimill Grain Mills. The Nutramill Harvest grain mill is a burr mill. The hopper acts as a funnel, filling the milling chamber with wheat as you pour. The stones inside the mill are close together. If I pour the wheat into my burr mill before turning it on, the wheat will fill the space between the stones and will clog the mill, preventing it from starting.


My Nutramill Impact mill is an impact grain mill. The hopper in this mill is closed on the bottom, preventing the grains from dropping into the milling chamber until the unit is turned on. In this mill, I can fill the hopper before turning on the machine. While I expect most mills work similarly, be sure to check your owner’s manual to determine if you should turn your mill on before adding the grain.
Select the coarseness adjustment of your mill. Some mills have an adjustment setting separate from the power button. Also, make sure that if your mill has any filters, they are placed correctly. If you previously cleaned the filter, the filter should be completely dry, not damp or wet.
Step 3: Fill the Grain into the Mill
Once you have started the grain mill, pour the grain into the hopper. With a burr mill that mills the flour into a bowl where you can see the flour, you can make any necessary adjustments to coarseness. It’s important not to turn the mill off until all the grain in the hopper has finished running through the mill.
If your flour goes into an enclosed bowl, mill just a small amount of grain at a time to check your setting to make sure you are happy with the flour adjustment before adding all of your wheat berries. Once you become familiar with the setting on your impact mill, you won’t need to do this any longer.

Step 4: Use and Store Freshly Milled Flour
It’s best practice to use freshly milled flour when you mill it. Once wheat has been ground, it begins to oxidize. I like to think of oxidation in terms of an apple. A freshly-cut apple will slowly begin turning brown from oxidation. If you slice an apple and dehydrate it, the oxidation will stop. The apple will no longer continue turning brown, and the nutritional value of the apple is locked in.
Baking with fresh-milled flour is very similar. When you mix the flour into a dough and bake it, you stop the oxidation and lock in the nutrients of the wheat. If you mill wheat into flour, but leave it uncooked, the flour will begin to oxidize, losing nutrients. Within days, much of the nutrition will be lost unless you take action to slow the oxidation process.

Store Properly
Any flour that you can not use immediately should be stored in an airtight container. While flour is shelf-stable at room temperature, it’s best to keep any unused flour in the refrigerator. This will slow the oxidation, though it won’t stop it. If you prefer to mill a lot of flour at a time, store the flour in the freezer. For long-term storage, it is best to store the wheat in its whole form, rather than the flour.
Properly store your baked goods. One of the best parts of making your own food with fresh milled wheat is knowing exactly what is in your baked goods. But keep in mind, they will not last like food full of preservatives. Be sure to use or store your baked goods properly so they last.

Looking for resourcES?
Everything you need to know to get started using fresh ground flour!
Don’t know where to start?This page is dedicated to helping you navigate the resources available to get you started on your fresh ground flour baking journey.
Tips and Tricks to Baking with Fresh Milled Flour
My biggest encouragement to anyone starting a fresh-milled flour journey is to use your mill! Even if you have purchased a grain mill for the sake of preparedness, use your grain mill. Should a time come when you need your preps, you want to know how to use them. Fresh milled flour is a different animal; even if you have been baking for years, don’t be discouraged if it takes practice learning to bake with fresh flour.
Use Fresh Milled Flour Recipes
We are fortunate that there are so many sources of recipes specifically designed for fresh-milled flour. When first making the switch, I highly recommend using recipes that were developed for fresh milled flour. While I have a few recipes here at Kowalski Mountain, Grains in Small Places is one of my favorite blogs dedicated to fresh-milled flour.
Converting Recipes
When converting recipes from all-purpose flour to fresh milled, the rule of thumb that I follow is to add 1/4 cup MORE flour for every cup in the recipe. If the original recipe calls for 2 cups of flour, you will add 2 1/2 cups. This is a general guideline, but it will depend on the grains you choose. When converting a new recipe, I usually add the same amount of flour stated in the original recipe, but be prepared to add more. Some grains, such as kamut, will use more liquid rather than flour, so it’s a rule of thumb, not a hard rule. The more you practice, the better you will get at converting recipes.
Autolyse Bread Dough
With breadmaking, I like to autolyse my dough. This simply means to allow the dough to rest. An autolyse can be done in two ways. I mix everything in the recipe except the yeast into a shaggy dough. Then allow the dough to rest anywhere from 30 minutes to 2 hours. You can even autolyse overnight if you prefer, though in an overnight rest, I might also leave the eggs out until the next day as well. Once the dough has finished autolyse, add the yeast (or any additional ingredients you did not previously add) and knead the dough. Continue as usual. An alternate method to autolyse is to mix only the liquid and the flour for autolyse, holding all the additional ingredients, including the oil, eggs, sugar, salt, and yeast.

Why is autolyse important? Fresh milled flour contains the bran and the germ, which are coarser than the endosperm. By allowing the dough to rest, the more coarse parts of the flour will soften, making a softer bread. While we want a nutrient-rich bread, we still like our bread to be soft and fluffy! While homemade bread is different than store-bought (and shouldn’t we expect it to be), we do like a soft texture.
If you loved this project, you’ll love these projects too:


Other Softening Techniques
There are other methods of softening the flour and helping whole grains improve their gluten development. The sponge method is one example of a two-part fermentation process. In this method, mix warm water, approximately half the flour and the yeast into a thick batter. Allow the sponge to ferment until the mixture becomes bubbly. This could be as little as 15 minutes or several hours. Once the first ferment is complete, add the rest of the ingredients. It’s best to add flour just a 1/2 a cup at a time until the dough forms. Then knead and continue as usual.
Another method to create soft breads is called the tangzhong method. This method is an Asian technique that precooks a portion of the flour and water into a thick roux. One part flour is mixed with five parts water (or milk) and cooked to 150 degrees. This gelatinizes the starches in the flour, making a sticky paste. Once the roux cools, mix it in with your dough and continue the recipe as usual. This method can also be referred to as a scald.

Tips for Baking Cookies
Cookies are one of my favorite foods to bake using ancient grains. I love the flavor variation that the grains give the cookies, and I feel better about eating a cookie baked with nutritious flour. I find it’s best to chill your cookie dough before baking. When baking, I mix the dough and shape the cookies. Once shaped, I chill the dough for cookies that I will bake immediately. Others I freeze as raw cookie dough. While you can bake cookies made with fresh milled flour right away, the cookies tend to spread more.
Cookie Hack
Some bakers use a glass, canning ring, or other round shape to shape the cookies when they come out of the oven. Place the ring over the cookie and gently swirl the cookie. This makes the cookie perfectly round and creates an even thickness of the cookie edge. The cookies need to be soft and fresh out of the oven for this hack to work!
Tips for Baking Quick Breads
Most quick breads are made from soft wheat or other ancient grains that are of a softer texture. While a long autolyse is unnecessary, almost all batters will benefit from a short rest. I allow most batters to rest 15 to 30 minutes to completely hydrate the flour. It also helps when converting recipes to allow the flour to hydrate before adding more flour.

Enjoy the Journey
Milling your own flour is more than just preparedness and nutrition; it’s about reconnecting with real food! Every loaf of bread, cookie, or cake you bake with fresh-milled flour is a step toward healthier, more intentional living. With any new venture, embrace the challenge and expect an adjustment. Learning to bake with fresh milled flour takes time. Don’t get discouraged for less-than-perfect results. An imperfect cookie or more dense bread is still delicious! Knowing that you are cooking with the most nutritious flour you can is worth the practice! Before long, baking with fresh milled flour will no longer challenge you but inspire you as you explore new grains and flavor experiences that take your baking to a whole new level.

About the Author: Barbra-Sue Kowalski grew up on a small hobby farm. She was always drawn to farm life, however, she was stuck in an urban life far from her roots. Barbra-Sue was a single mom for 13 years, raising her 3 children on her own. She met Philip in 2018 and they married in 2021. Between the two of them, they have 5 grown children and 6 grandchildren. These empty nesters are following their dreams! As they both turn 50, they are building their off-grid homestead to live the life that they dream about. Learn more about Philip and Barbra-Sue here. Contact them here. To leave a comment on this post, please scroll down.


One Comment