
DIY Chicken Dropping Boards: The Easy Coop Cleaning Hack

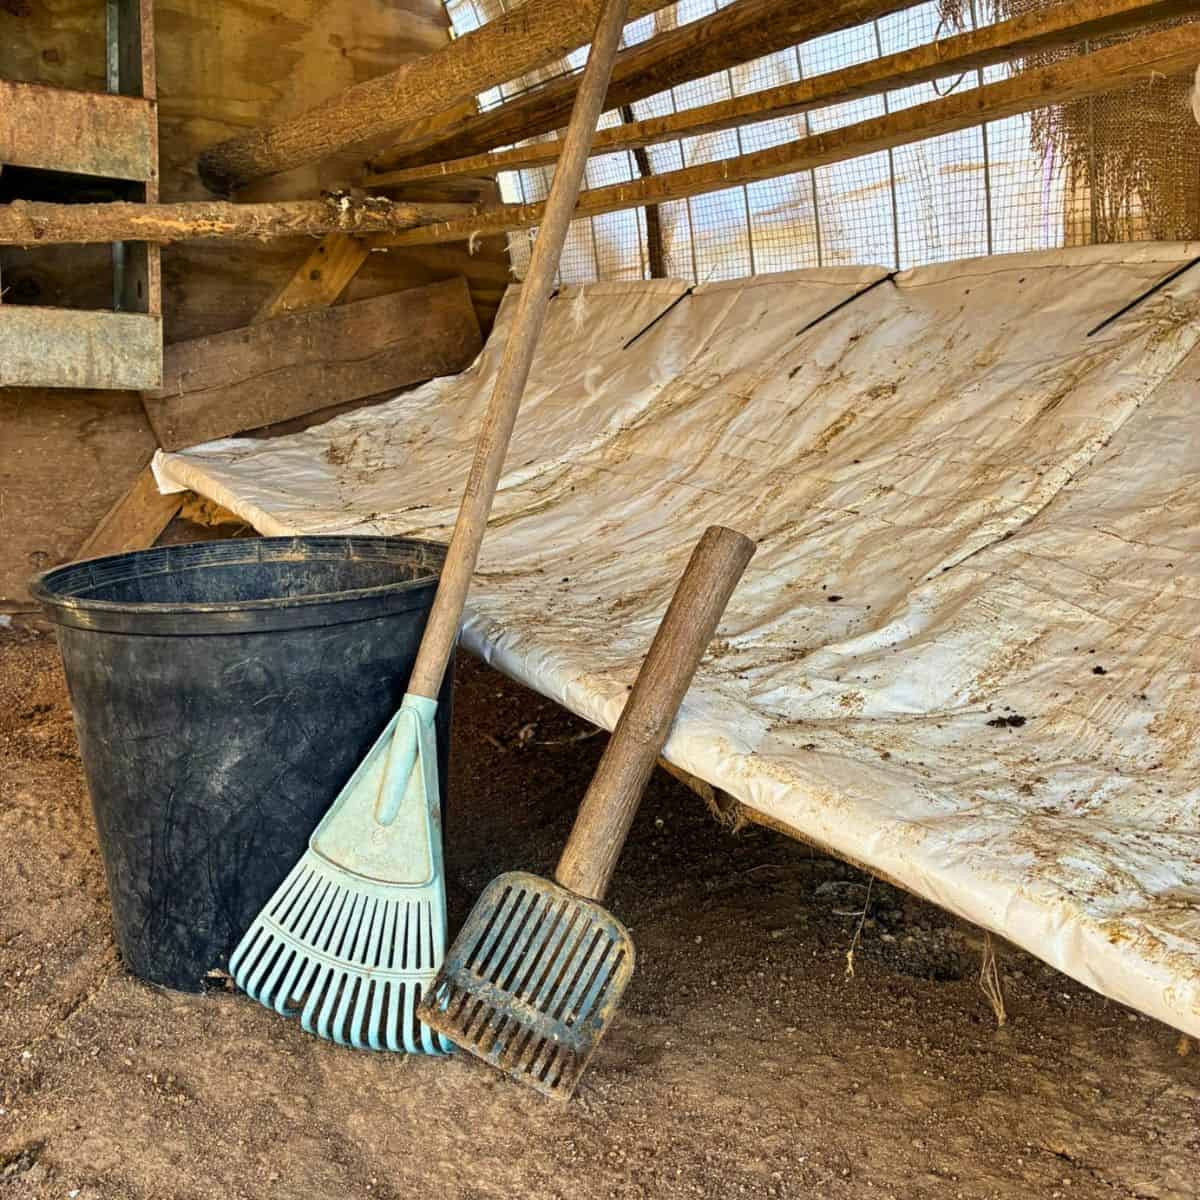
As any chicken keeper knows, the biggest mess in the chicken coop is below the roosting bars. Every night, the flock settles in on the roosting bars, and by morning the amount of manure that accumulates can be overwhelming. Especially if “just a few” hens become a flock with dozens of chickens! For years, I spent a ton of time raking and turning the soil in the chicken coops to try and keep them clean. It’s a nasty, sweaty job that has to be done far more often than I want to. Dropping boards are an easy way to keep control of one of the dirtiest jobs in the chicken coop. My favorite style of dropping board is a “poop hammock” made with recyclable materials you likely already have!
What are dropping boards?
Dropping boards are simply a surface placed beneath the roosting bars to catch chicken poop. Instead of allowing manure to fall to the ground, contaminating the bedding, the dropping board collects the manure in an easy-to-clean area. I have used a few different kinds.
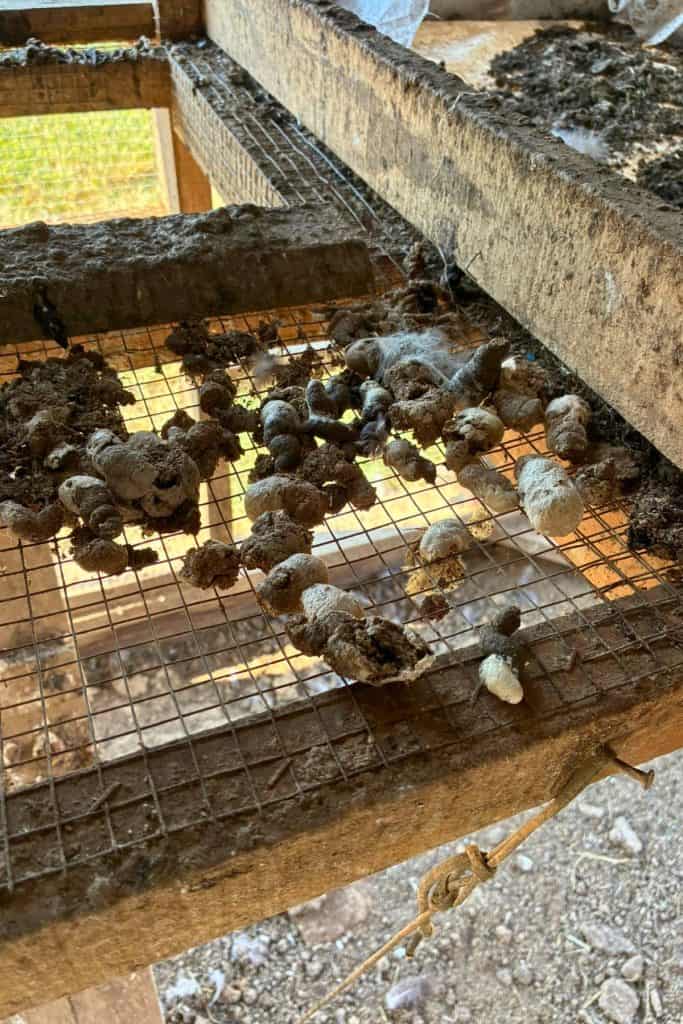
 Unlined wire dropping board
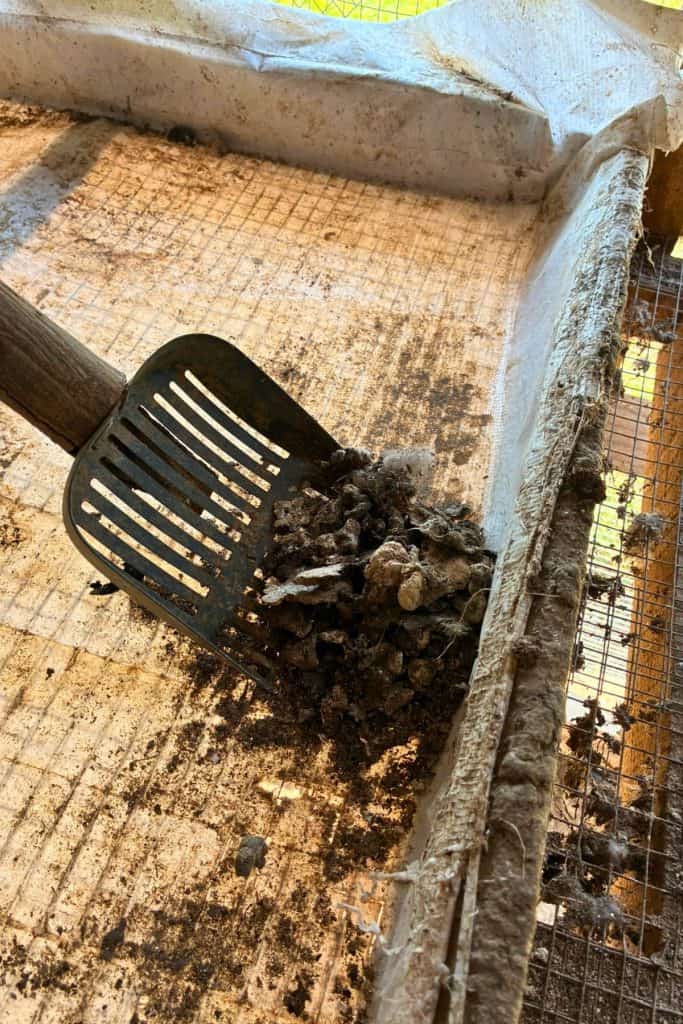
Very hard to clean- Lined wire dropping board, easier to clean.
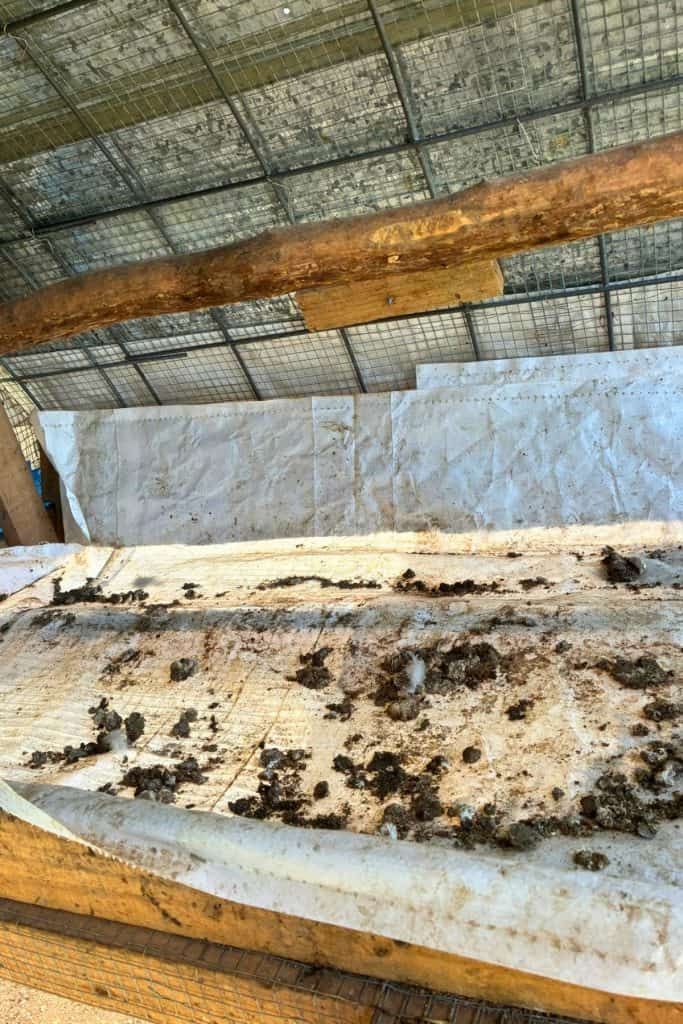
- This dropping board is framed, must scoop manure out of the frame.
SUMMARIZE & SAVE THIS CONTENT ON
The latest on Youtube:
Why use dropping boards in the coop?
Dropping boards offer several perks in your chicken coop. They keep manure out of bedding. Clean bedding means nest boxes will be cleaner, resulting in cleaner eggs! Dropping boards are fast to clean, helping keep the coop cleaner and healthier. Plus, they make a disgusting task a little more tolerable…. a little.
Easy to Keep Clean
Dropping boards are easier to clean because the chicken droppings never get into the soil. Once manure gathers on the floor of the coop, chickens walk through it, tracking it through the bedding. Too often, it’s a task that gets left until it becomes a smelly, nasty problem. While I use a deep litter method in my coops in winter, the more manure you remove daily from the coop, the easier the job will be! Chicken coops that aren’t cleaned regularly can contribute to excessive moisture, flies, and ammonia odor.
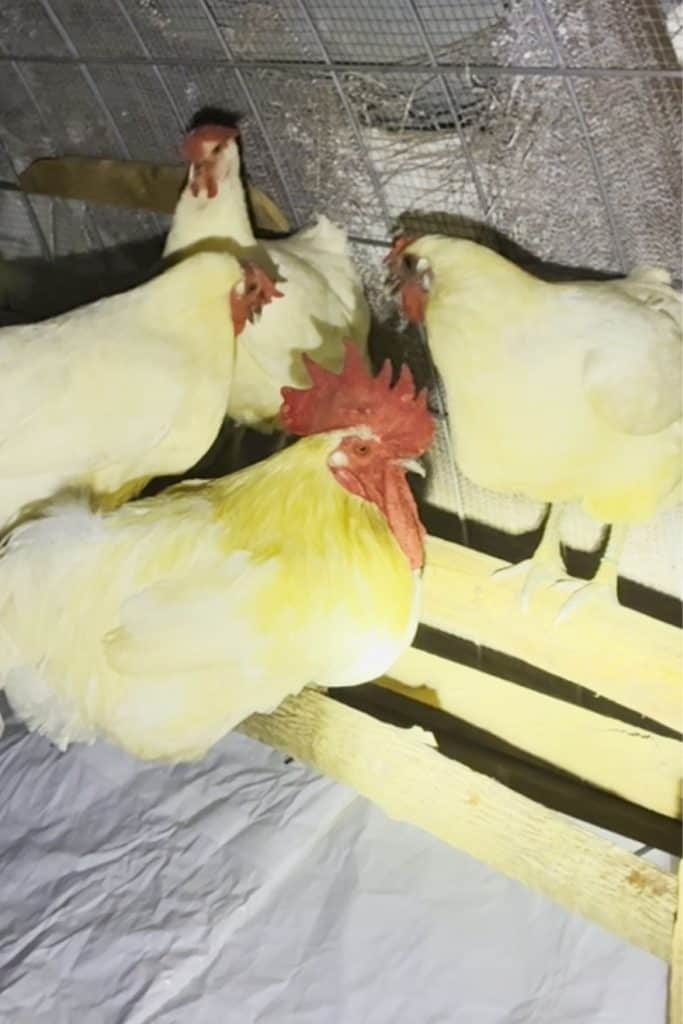
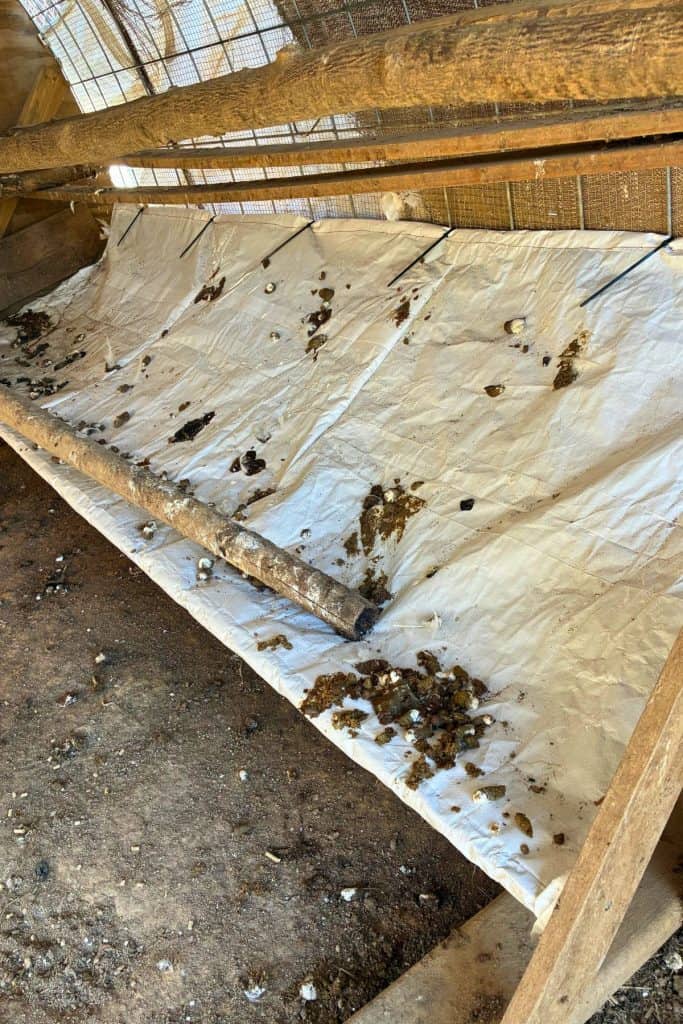
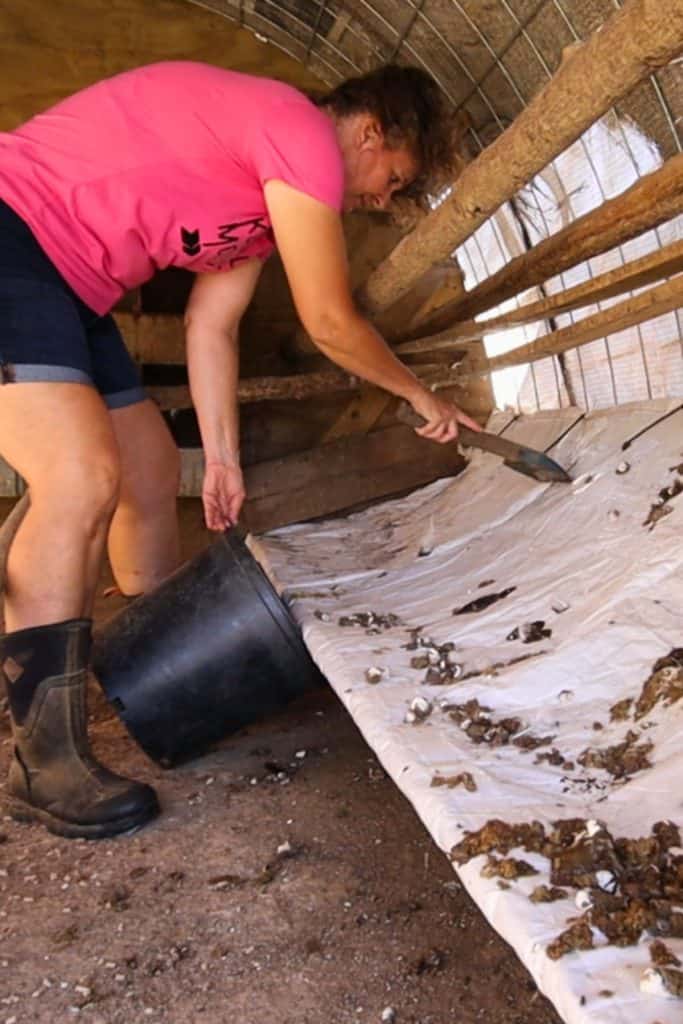
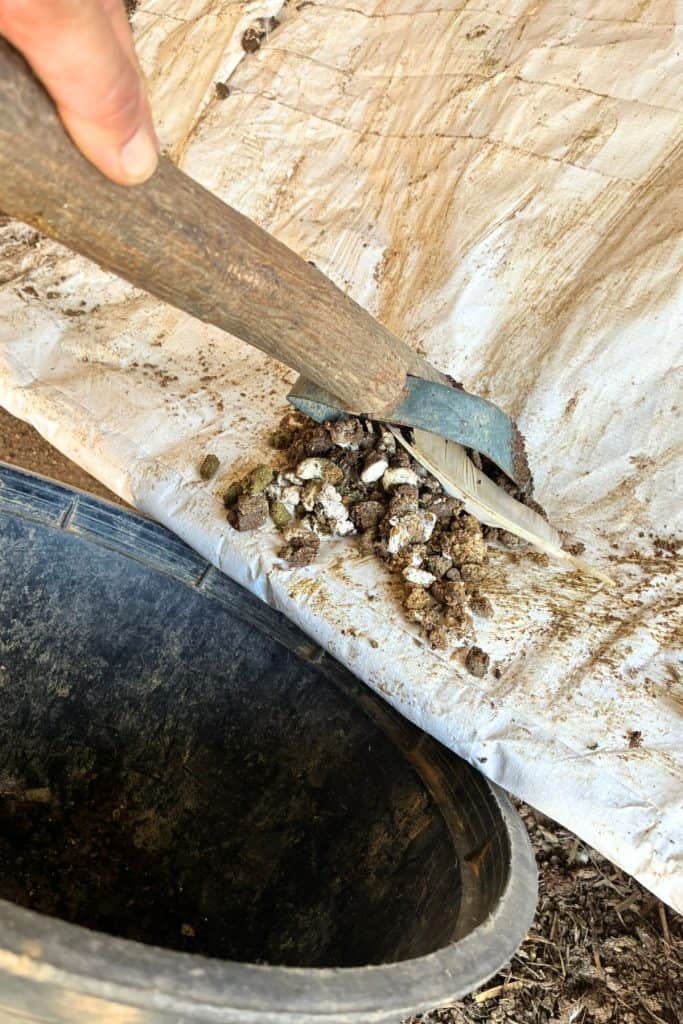
My poop hammock is a single surface to clean, and it gathers all the manure under multiple roosting bars. To clean my poop hammock, I use a metal kitty scoop and scrape the chicken manure into a bucket. Even with about 60 chickens in a single coop, it takes me just minutes a day to clean the poop hammock.
Composting Made Easy
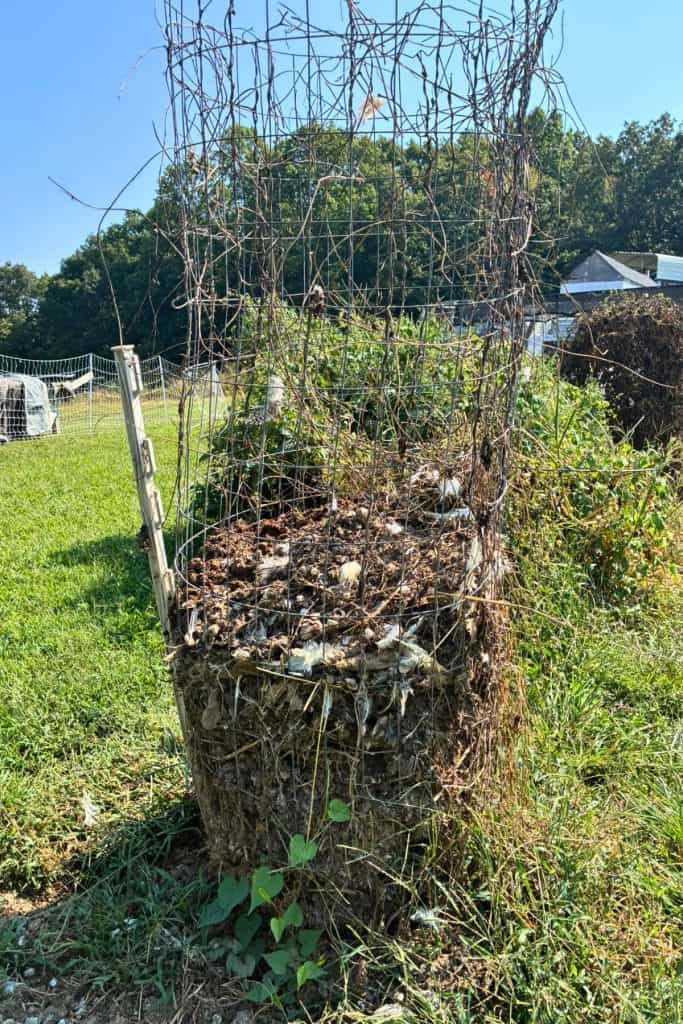
One of my favorite things about my coop hammock is that it’s so easy to collect the chicken manure for composting. I collect only the manure: no extra bedding, no gravel, no sand or dirt.
We compost chicken manure separately from our regular compost pile. Poultry feces is a hot manure that takes longer to cure before it can be added to the garden.
My Favorite Dropping Board Design
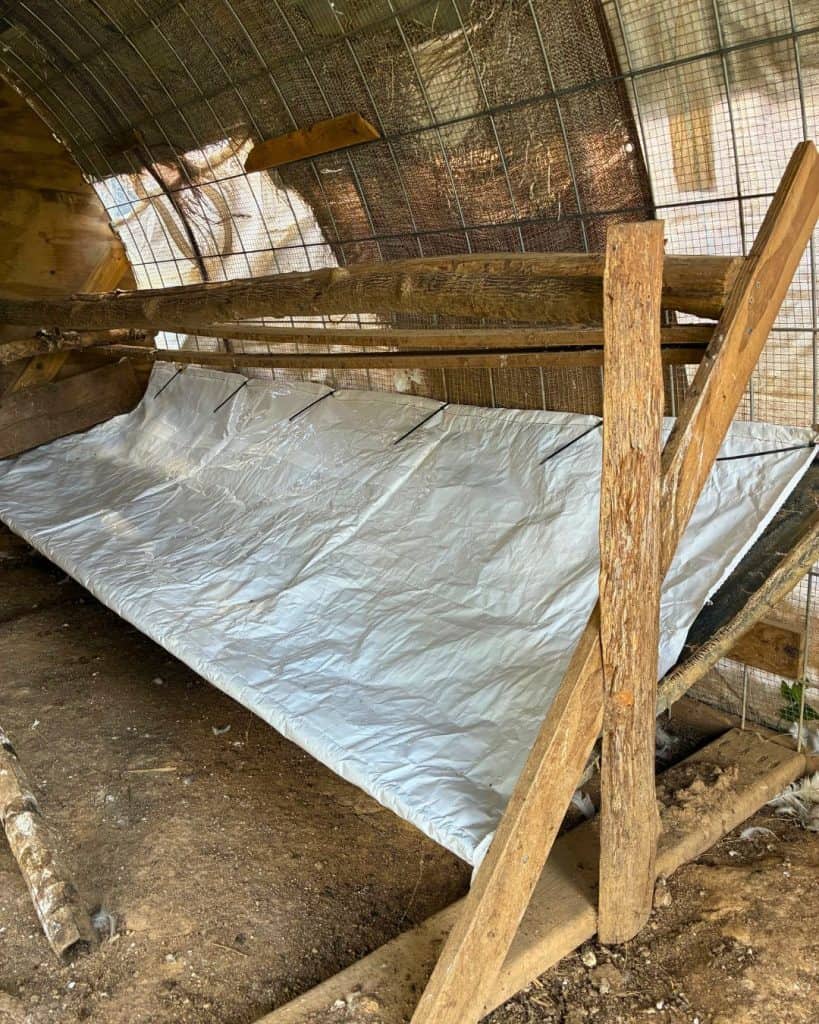
My favorite dropping board is a poop hammock. We have several chicken coops on our farm and currently have two dropping board designs in use. By far, the poop hammock design is the easiest to clean. The slope ensures all the poop gathers at the bottom of the hammock. The lip-less design means no scooping out of corners and edges. I also find it works best with multiple roosting bars. A large flat board under multiple roosts means I might need to reach all the way to the back, and possibly kneel (ewww) to get there. The hammock slopes towards me, making it easier to manage.
Making a Poop Hammock
Supplies you’ll need for this DIY project
How to Make a Poop Hammock
Please note: This is a general guide; every chicken coop is slightly different. I am providing two options: one using a top board to attach to a wooden chicken coop, or a corded option to attach to a wire chicken coop. See the “How To” card for specifics.
- Step One: Measure the length of your roosting bars. Cut one or two 2×4′ to size depending on your coop style.
For a wooden chicken coop, you will need two boards; if your chicken coop is made of wire, you will need one. - Step Two: If installing in a wooden chicken coop, attach the top board to the back wall of your coop at about the same height as your top roosting bar.
- Step Three: In both designs, attach a board at the bottom. It needs to extend about 8 to 10 inches beyond the roosting bar to ensure that all manure lands on the hammock.
- Step Four: Measure and cut the hammock fabric. I used recycled grain sacks. First, remove all stitching and cut flat. Once flat, I sew the bags together with my sewing machine, making a large tarp the size needed. The poop hammock needs to be as long as the roosts and have sufficient width to reach the bottom board, with an extra 10 to 12″ of fabric to create a hammock effect.
- Step Five: Attach the top of the poop hammock to the board you installed (if using) or use the cordage and attach the top of the poop hammock to the wire at about the same height as the top roosting bar. I secure it with zip ties.
- Step Six: Take the bottom length of your poop hammock and fold over the bottom board so that the board is covered. Staple to the bottom. This creates a seamless surface that allows you to scrape the manure into your bucket.
Please note: The hammock should have a slight slope; don’t pull tight.
Attaching the poop hammock to wire?
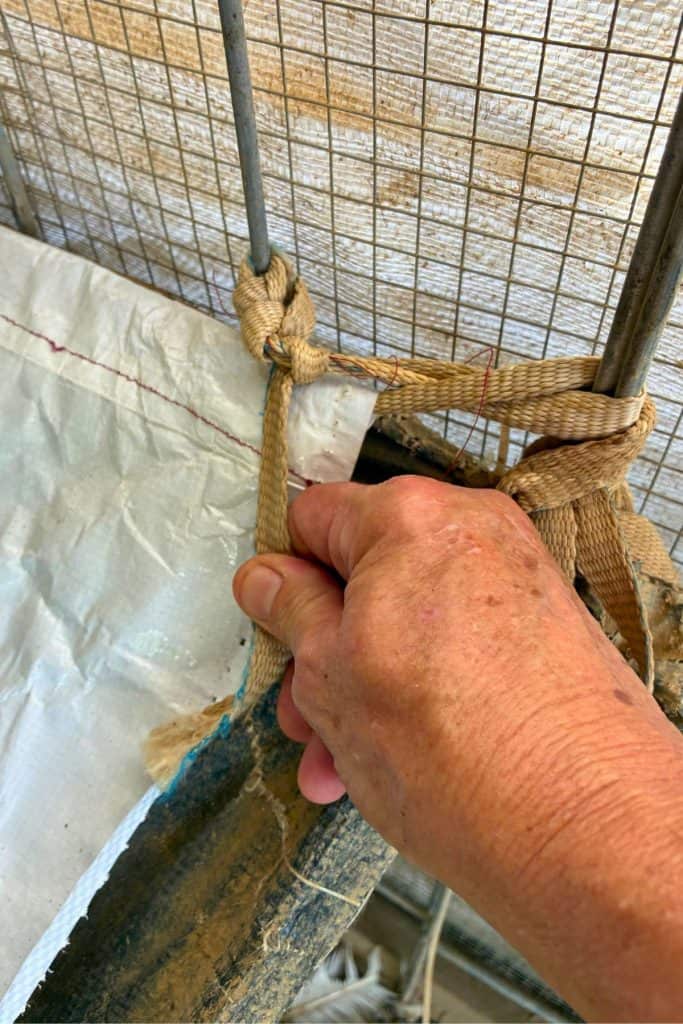
Make the poop hammock like a curtain with a pocket at the top. I used 550 cord in the pocket to hang the poop hammock at the top, securing every few inches with zip ties. More details in the “How To” card.
- Use cordage to secure the poop hammock to the wire coop.
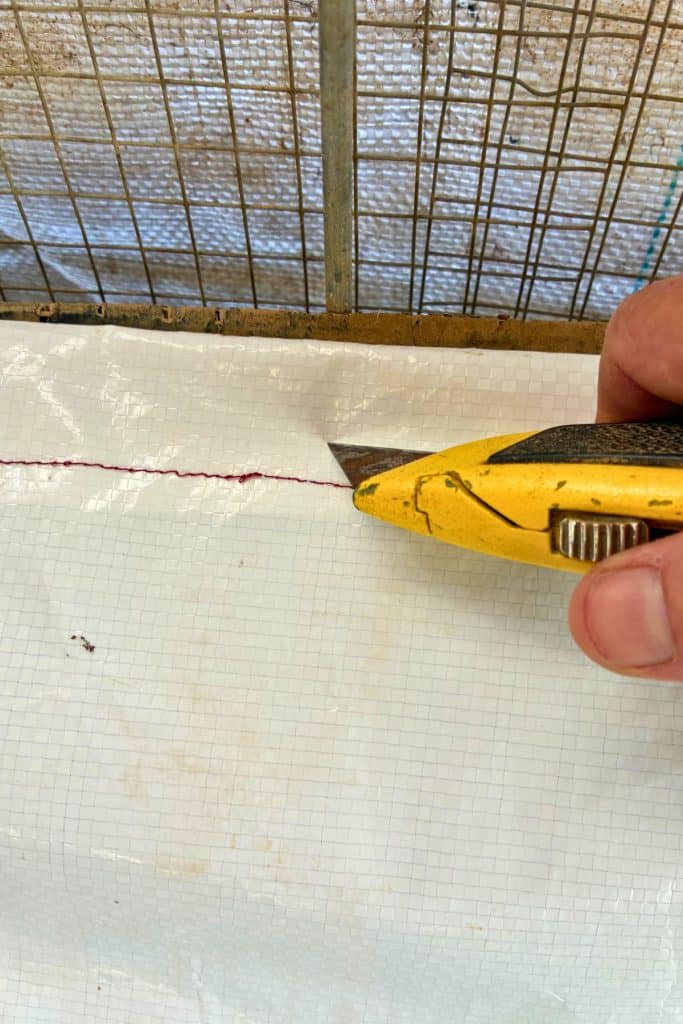
- Cut a slit under the cordage to insert a zip tie.
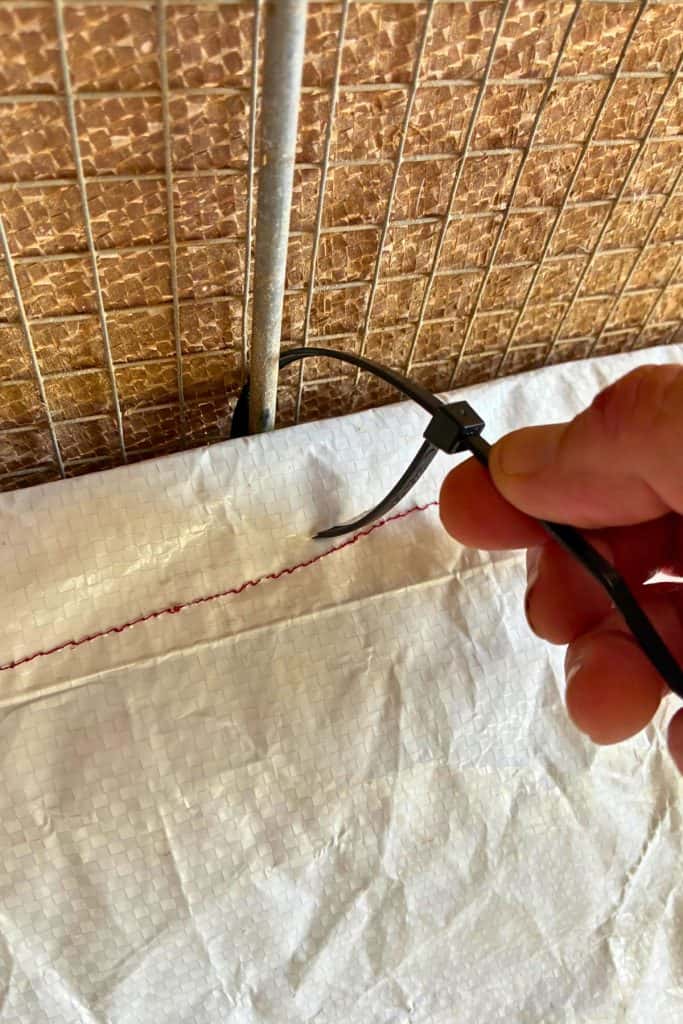
- Insert the zip tie into the slit. Be sure it goes around the cordage to secure the poop hammock to the wire.
Our Favorite
All About Chickens

Find this post helpful?
Share it on Pinterest
How to Clean a Poop Hammock
It’s so simple! I use a metal kitty scoop, but a small shovel or flat trowel would work. Scrape the poop down the poop hammock and collect it in a bucket. I keep a small rake in the corner of my chicken coop and use it to rake up any manure that falls off or that the chickens knock off. This takes only MINUTES a day (and I had over 60 chickens)! Once I collect manure in a bucket, I dump it into my designated chicken poop compost pile. That’s it!
A Little Less Disgusting
Using a poop hammock has removed the dread of cleaning my chicken coop. Instead of cleaning weekly (or let’s be real, monthly) and spending hours shoveling poop, I spend a few minutes each day and stay ahead of the mess. Don’t get me wrong, cleaning up poop is never a fun job, but keeping up with it daily makes it more manageable and a little less disgusting!
DIY Poop Hammock
Equipment
- drill
- staple gun
- utility knife
Ingredients
- 1 or 2 2×4' boards
- screws
- tarp or waterproof material
- zip ties when installing on wire coop
- cordage when installing on wire coop
Instructions
Installation Instructions for a Wooden Chicken Coop
- Measure the length of your roosting bars. Cut two 2×4" to size.
- Attach the top board to the back wall of your coop at about the same height as your top roosting bar.
- Attach a board at the bottom. It needs to extend about 8 to 10 inches beyond the roosting bar to ensure that all manure lands on the hammock.
- Measure and cut the hammock fabric. I used recycled grain sacks. First, remove all stitching and cut it flat. Once flat, I sew the bags together with my sewing machine, making a large tarp the size needed. The poop hammock needs to be as long as the roosts and have sufficient width to reach the bottom board, with an extra 10 to 12" of fabric to create a hammock effect. Optional: I made a two-layered system. To add additional support to my poop hammock, I used an old tarp beneath my grain sack liner. Since the chickens walk on it, I want it to be strong enough to hold them. The liner underneath doesn't need replacing; however, the top liner may need replacing as it wears. Mine lasted over two years.
- Attach the top of the poop hammock to the board you installed. You can staple it or use a thin board, such as a 1×2", to sandwich the poop hammock hem between the two boards.
- Take the bottom length of your poop hammock and fold over the bottom board so that the board is covered. Staple it to the bottom. This creates a seamless surface that allows you to scrape the manure into your bucket. Please note: The hammock should have a slight slope; don't pull it tight.
Installation Instructions for a Wire Chicken Coop
- Measure the length of your roosting bars. Cut one 2×4" to size.
- Attach a board at the bottom. It needs to extend about 8 to 10 inches beyond the roosting bar to ensure that all manure lands on the hammock.
- Measure and cut the hammock fabric. I used recycled grain sacks. First, remove all stitching and cut it flat. Once flat, I sew the bags together with my sewing machine, making a large tarp the size needed. The poop hammock needs to be as long as the roosts and have sufficient width to reach the bottom board, with an extra 10 to 12" of fabric to create a hammock effect. Optional: I made a two-layered system. To add additional support to my poop hammock, I used an old tarp beneath my grain sack liner. Since the chickens walk on it, I want it to be strong enough to hold them. The liner underneath doesn't need replacing; however, the top liner may need replacing as it wears. Mine lasted over two years.
- To make it easier to attach the top of the poop hammock to the wire, I sewed a pocket at the top edge of the fabric. Think of it like a curtain, except the pocket will be threaded with cordage instead of a rod. I used a length of 550 cord about 3 feet longer than the finished hammock. As I sewed the pocket, I laid the cordage in the pocket, being careful not to sew through the cordage itself. Once the pocket was finished, the cord would slide freely through the hem, giving me a removable cord that I used to secure the top of the hammock to the wire.
- Use the cordage and attach the top of the poop hammock to the wire at about the same height as the top roosting bar. Secure it with zip ties. I cut small slits through the poop hammock, underneath the cordage in the pocket, so the zip tie would be wrapped around the cordage, securing the poop hammock to the wire wall.
- Take the bottom length of your poop hammock and fold over the bottom board so that the board is covered. Staple it to the bottom. This creates a seamless surface that allows you to scrape the manure into your bucket. Please note: The hammock should have a slight slope; don't pull it tight.
Video

About the Author: Barbra-Sue Kowalski grew up on a small hobby farm. She was always drawn to farm life, however, she was stuck in an urban life far from her roots. Barbra-Sue was a single mom for 13 years, raising her 3 children on her own. She met Philip in 2018 and they married in 2021. Between the two of them, they have 5 grown children and 7 grandchildren. These empty nesters are following their dreams! As they both turn 50, they are building their off-grid homestead to live the life that they dream about. Learn more about Philip and Barbra-Sue here. Contact them here. To leave a comment on this post, please scroll down.


