DIY Breast Milk Soap Recipe: How to Make Soap
As an experienced soap maker, I was thrilled when my daughter requested we make soap for my newest granddaughter using her own breast milk. This cold-processed soap uses what many consider liquid gold as the liquid base, creating an enriching, all-natural soap that is gentle enough for even my youngest grandchild. This breast milk soap recipe is made using extra breast milk and simple oils that we use and even render on the homestead. While soapmaking may seem intimidating, this simple recipe creates a gentle soap that’s perfect for the whole family.
Why Make Soap with Breast Milk?
For centuries, milk has been well known for its benefits to the skin. All types of milk, from cows, goats, donkeys, and even camels, are well known for their benefits in skin care. Cleopatra, an Egyptian queen, bathed in sour donkey milk to improve the appearance of her skin. While the Egyptians didn’t understand the science of skin care, we now know that as the milk soured, lactose converts to lactic acid, rejuvenating the skin.

MomCozy Breast Pump
It’s amazing how sophisticated breast pumps have become! This wearable breast pump is discreet. Uses your smartphone for total control. Quiet, comfortable, rechargeable and efficient!
Today, many young mothers use breast pumps to express their milk. This makes it possible for women to return to work if necessary to support their families. I was completely amazed by the sophistication of today’s breast pumps in comparison to the ones available in my day. As a Gen X mom, I had little experience with breast pumps. They looked more like a milking machine that required absolute privacy to use. Today’s breast pumps are small, unobtrusive, and can be operated by your smartphone. My daughter’s breast pump is called MomCozy, a wearable breast pump that is extremely discreet. You can honestly use this breast pump while doing dishes or tending to your children.

Since breast pumps are so commonly used by young mother’s you may find yourself with milk that was defrosted but not used in the recommended 24-hour time period. Making your own gentle cold-processed baby soap bars is a great way to you this precious resource!
Is Lye Soap Gentle?
Historically, soap was made with wood ash, which creates lye. It was an unpredictable product that was harsh on the skin. Today, soap makers use sodium hydroxide, commonly known as lye, to make soap. While lye is a caustic substance that should be handled with care, and handled using proper safety equipment during the soap-making process. Lye is more predictable to work with due to the controlled concentrations of the chemical compound.
Traditional soaps are made when fats and oils are mixed with sodium hydroxide. Through the process of saponification, the molecules are bonded together to create soap. When done properly, homemade soap no longer contains lye. The lye has been completely transformed by the saponification process. Through further curing, the pH of the soap continues to neutralize, creating a gentle product for your skin even the skin of your precious baby. Before you begin, I highly recommend learning about safe lye handling so that you can proceed with confidence!

Find this post helpful?
Share it on Pinterest
Ingredients you’ll need for this recipe
Get the recipe when you join our newsletter
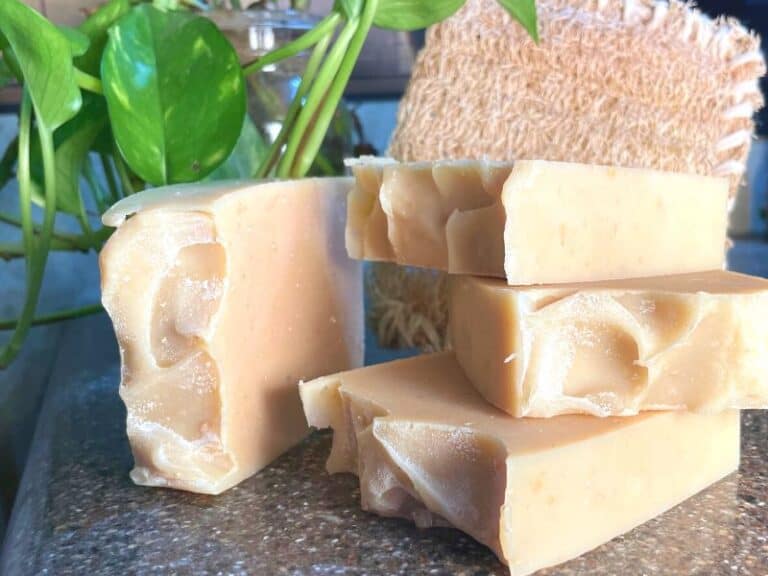
Would you prefer a soap recipe that excludes animal fats?
You’ll love this blend of oils that’s rich, bubbly and nourishing for your skin!
Advanced Preparations for Soap Making
- Freeze your breast milk. During the saponification process, the mixture can reach a temperature of up to 200 degrees. At these temperatures, the milk would be scorched! To prevent overheating the milk, freeze the breast milk in either breast milk bags or an ice cube tray.
- Prepare your oatmeal: While you can purchase colloidal oatmeal that is already perfect for soap making, I use my own oats. Run the oatmeal through a food processor and grate the oatmeal as finely as possible. For adults and children, the oatmeal can be mixed in as is. However, since this soap is being made for a baby, we sifted the ground oatmeal through a fine sieve so that only the finest parts of the oatmeal were added to the soap
- Select your essential oil: Only choose essential oils that are safe for infants!
Find the measurements and full recipe below!
Preparing the Workspace
While it is safe to make soap inside, you need to work in a well ventilated area. Since we live in an RV, I always make soap outside. Gather the necessary equipment and measure all additives such as colorants, essential oils, and oatmeal.
Soap Making Equipment
- Stainless steel bowls
- Large Bowl for Ice Bath
- Digital Scale
- Digital Thermometer or Infrared Thermometer
- Spatulas
- Stick Blender AKA Immersion Blender
- Soap Mold
- Pot to use as a double boiler
- Alcohol in a Spray Bottle
- Containers for Measured Ingredients (canning jars, or plastic bowls)
- Ice cube trays
- Spoon to shape the soap
- Drying Rack

Suit Up for Safety
Always wear the appropriate safety gear when handling lye. Learn more about safe lye handling here.
- Safety Goggles
- Gloves
- Additionally, soap makers should wear long sleeves, pants, and shoes.
When you have your equipment and work area prepared and you are ready to measure the lye, it’s time to begin wearing the safety equipment. Put on your safety goggles and gloves, and wear them until the dishes are washed.
Measure and Melt the Oils
Begin by measuring and melting the lard and coconut oil (or solid oils). I prefer to melt my oils in a double boiler. I find that melting oils on the stove is better than using the microwave to prevent overheating the oils. While overheating doesn’t hurt the oils, you will have to wait longer for the oils to cool so that you can continue to the next step. Add the olive oil to the mixture and set aside. I like to keep the hot water in the double boiler available in case I need to reheat the oils. Our goal is to cool the oils to 70 to 80 degrees.
The Lye Base of the Breastmilk Soap
Begin by measuring your frozen breast milk. Place in a stainless steel bowl. To protect the milk from scorching, I place the stainless steel bowl in a larger bowl full of ice.
Measure the lye into a designated container used for soap making. When ready, begin adding the lye to the frozen milk in small amounts. Stir constantly. The breast milk will immediately begin to melt; this is the chemical reaction of the lye interacting with the milk. Keep adding small amounts of lye until all has been added. Continue stirring constantly until the lye is completely dissolved. Stir longer than you think necessary. Look for signs of lye on the bowl and spatula; the lye must be completely dissolved so that the finished soap will not contain any undissolved lye that can burn your skin.

Set aside the lye base, but continue to monitor the temperature. Depending on the ambient temperature, you may need to keep the lye base in the ice bath; however, you will also want to make sure the base does not get too cool. When working with milk-based soaps, the best temperature to soap at is between 70 and 80 degrees. Remove the lye base from the ice bath if necessary. You’re ready to begin when the lye base and the oils are within 10 degrees of each other AND within that 70 to 80 degree window.
The Magic of Saponification
This is my favorite part of soapmaking! Saponification is when the lye base and the oils are combined. Through the emulsification process, the lye and oil bond together and become soap. If done correctly, the soap no longer contains lye at all, as the particles are bonded together into a brand new chemical. (I know the science nerd in me is showing). While you can stir soap by hand, a stick blender makes this step so much faster. I mix the soap with both a stick blender and a spatula. The spatula allows me to keep scraping the edges of the bowl, and the blender is doing the hard work of emulsifying the mixture.

Keep mixing until you reach medium trace. Trace will be apparent as the soap base begins to thicken. Medium trace is reached when the drippings off your spatula begin to hold their shape. Keep in mind, some essential oils, such as vanilla, can accelerate trace. When working with those types of essential oils, I mix to a light trace where the soap base is just beginning to thicken, but it’s not quite holding its shape together. This will give me a little more time to work.

What is Trace?
Trace is when the lye base and oils have emulsified and begin to thicken. When the soap is at medium trace, the drippings from the spatula will begin to hold their shape. The soap batter will look like pudding.
Add your oatmeal and mix well. Next add the essential oils and clay mixture. I hand stir using only the spatula to prevent the mixture from thickening too quickly. Once the essential oils are mixed well, pour the soap batter into the molds.


Soap Molds
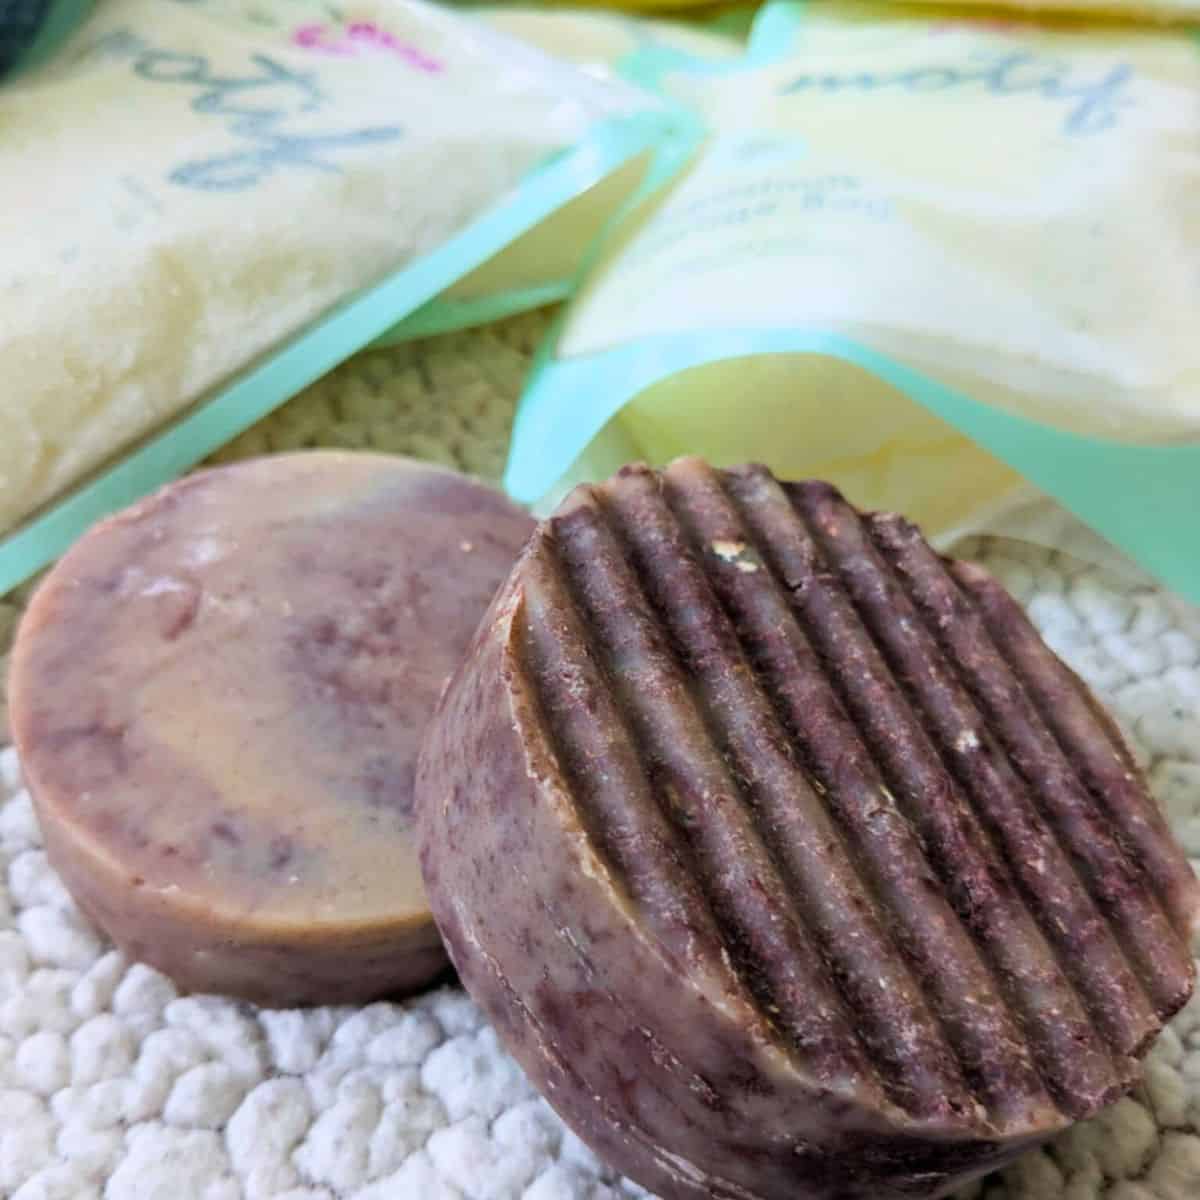
Soap molds come in a variety of styles. I typically make soap using loaf molds that I cut into bars. You can also use molds that create individual soaps. Always use a soap calculator to make any recipe adjustments based on the molds you use. My daughter felt that making the breastmilk soap in smaller silicone molds would make it more user-friendly when bathing a baby. The solution is to cut the larger bars we created to meet her needs.

SoapCalc is a free soap recipe calculator that allows you to make changes to soap recipes. If you make ANY changes ALWAYS run the recipe through a soap calculator to ensure your soap recipe is accurate.

Breast Milk Soap Recipe
Equipment
- safety equipment goggles, gloves
- immerison blender
- 2 stainless steel bowls
- spatula
- containers for measuring
- digital scale
- infrared thermometer
- Soap mold
- double boiler
- ice bowl
Ingredients
- 262.48 grams frozen breast milk
- 129.28 grams sodium hydroxide (lye)
- 297 grams lard
- 342 grams olive oil
- 261 grams coconut oil
- 28 grams lavendar essential oil
- 2 tsp kaolin clay powder used to anchor the fragrance, comes in a variety of colors
- 1½ to 2 tbsp oatmeal
Instructions
- Prepare in advance: Freeze breast milk into ice cubes.
- If you'd like to make your own oatmeal, grind oatmeal in a food processor and sift if you desire. Measure 1 1/2 to 2 tablespoons, set aside. Colloidal oatmeal can be purchased instead.
- Measure your essential oil and add kaolin clay. Mix well. Set aside.
- Prepare an Ice Bath.
- Gather all your soap-making supplies before beginning. Work in a well-ventilated area and be sure to wear the appropriate safety equipment. Gloves, goggles, long sleeves, long pants, and shoes.
- Place your stainless steel bowl (or heat-safe bowl, NO glass) on your digital scale and tare the weight to zero. Measure your frozen breast milk. Cubes of frozen milk can be cut to get an exact measurement.
- Place your stainless steel bowl into an ice bath bowl.
- At this step, you need to begin wearing your safety equipment, goggles and gloves.
- NOTE: Always tare scale before each measurement.
- Measure lye into a glass container (I use a sacrificed mason jar).
- Keep the bowl with the breast milk in the ice bath. Add lye in small batches, just a little at a time and stir. WARNING: The mixture will get VERY hot!
- As the breast milk cubes begin to melt, add more lye, continuing in small batches.
- After all the lye has been added, continue stirring until all the lye is completely dissolved. Stir longer than you think. I look for signs of undissolved lye on the side of my bowl and spatula. Lye is completely dissolved when the temperature is no longer increasing, check the temperature using a digital or infrared thermometer. You can strain the lye mixture through a strainer to remove undissolved lye prior to mixing with oils if you desire. Once the lye is completely dissolved, set it aside. I remove the bowl from the ice bath at this time.
- Measure oils in order of longest melt time.
- Start with lard, measure, and melt partially in a double boiler.
- Measure the coconut oil, add it to the melting lard, and continue to melt.
- Measure the olive oil, add it to the mixture. Continue until all oils are melted.
- Take the temperature of both mixtures, the lye solution and the oils. The ideal temperature for soap making when using milk is between 70 to 80℉ Ideally, the two mixtures should be within 10 to 15 degrees of each other.
- Be sure to use a heat-safe bowl at this time. Add the lye mixture to the oils. Pour the lye mixture over the handle of the spatula to lessen air added to the mixture.
- This is where saponification will take place. Using your stick blender and spatula, mix the mixture until trace. It's best to use your stick blender in short bursts. This takes time. Just keep mixing. Trace is achieved when drizzled soap from the stick blender holds its shape. Medium trace looks like pudding.
- Add the sifted oatmeal (if using). Stir.
- Once you achieve medium trace, add fragrance oils. Mix well. Be aware that fragrances can accelerate trace, be prepared to work quickly.
- Once the fragrance is mixed well, pour it into the soap mold. Use a spoon to shape the top. If you want to add any decorative touches to the top, it's time to do it now.
- Spray the soap mixture lightly with alcohol to prevent soda ash.
- NOTES: On the day you are making your soap, continue to wear the safety equipment while you clean your bowls and equipment.
- Allow soap to set up in the mold. I keep mine in a cooler where it can not be disturbed by animals or children.
- After 24 to 48 hours, remove soap from mold and cut into bars. Allow the soap to cure on a wire rack where it gets good air flow. Be sure it's away from animals and children for 6 weeks.
- Once the soap is fully cured, it is safe to use.
Notes
After the Soap is Poured
After the soap is poured, allow the soap to cool. If you want to encourage gel phase, insulate the soap. I simply put the soap molds into a cooler and allow them to harden. Be sure to place a towel on the bottom of the cooler, as the soap is still undergoing saponification and can continue to heat up. Allow the soap to sit for at least 24 to 48 hours.

Cure the Breastmilk Soap
Unmold the soap. If you used a loaf mold, cut the soap into bars. Place the soap on a stainless steel drying rack for 6 weeks. Curing is important to allow the soap to dry properly and for saponification to finish completely. During this process, the pH of the soap will continue to neutralize, making it safe to use.

How to Store Homemade Soap
Now that you’ve made your first batch of homemade soap, learn how to store it properly so it lasts!
Cold-Processed Breast Milk Soap
Making this DIY breastmilk soap with my daughter is so rewarding! Turning these precious ingredients into something useful is the perfect expression of homestead living. I love using my homemade soap, which contains ingredients I can pronounce and trust! While soap making may seem intimidating, I assure you it’s not nearly as scary as many people seem to think (even me)! This breast milk soap recipe is a beautiful way to honor the connection between motherhood and handmade living.
FAQ
YES! Making cold processed soap is the perfect way to use expired breast milk.
NO! Be sure to do you research to ensure the essential oil blend you choose is baby safe.
Cold processed soap needs to cure 4 to 6 weeks to ensure it’s properly dried and the saponification process has completed. Once done, the soap will have a nuetral pH.
A super fat refers to the amount of oil that remains unsaponified in a soap recipe. This oil makes the soap moisturizing and nourishing to the skin. A soap calculator helps you calculate the specifics.
Technically all soap contains lye, however, there is another method called the melt and pour method where the soap base is already made for you, allowing you to skip the lye step.

About the Author: Barbra-Sue Kowalski grew up on a small hobby farm. She was always drawn to farm life, however, she was stuck in an urban life far from her roots. Barbra-Sue was a single mom for 13 years, raising her 3 children on her own. She met Philip in 2018 and they married in 2021. Between the two of them, they have 5 grown children and 7 grandchildren. These empty nesters are following their dreams! As they both turn 50, they are building their off-grid homestead to live the life that they dream about. Learn more about Philip and Barbra-Sue here. Contact them here. To leave a comment on this post, please scroll down.


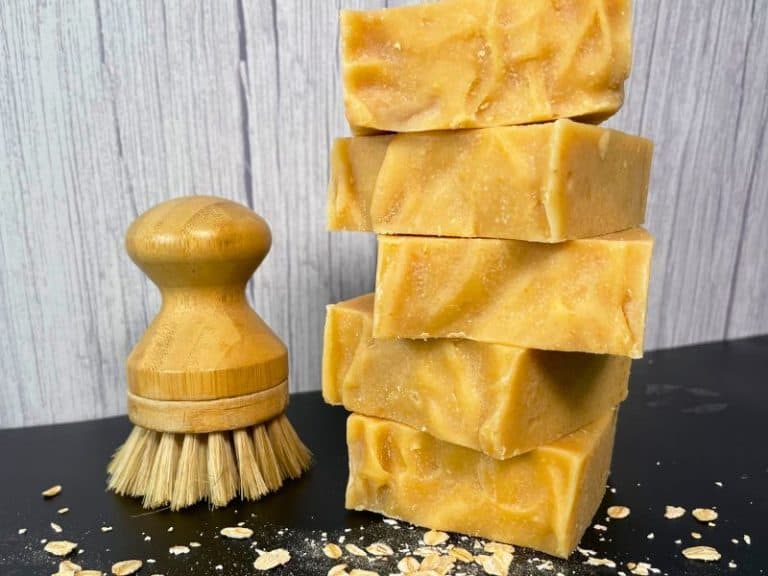

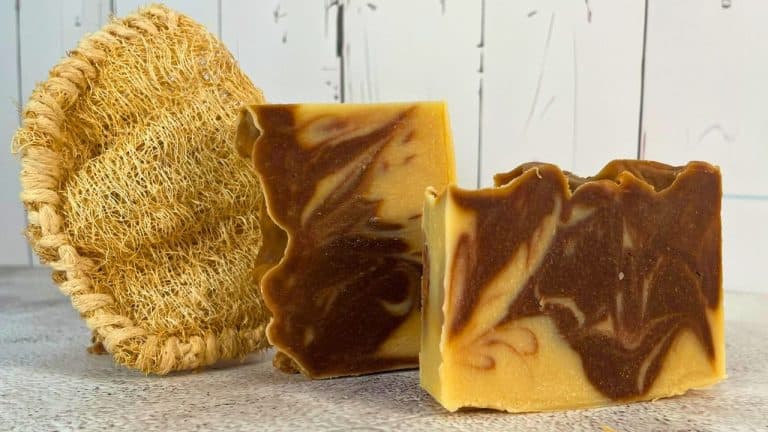
I love this blend of oils for cold-processed soap! Moisturizing with just the right amount of oatmeal for gentle exfoliation.