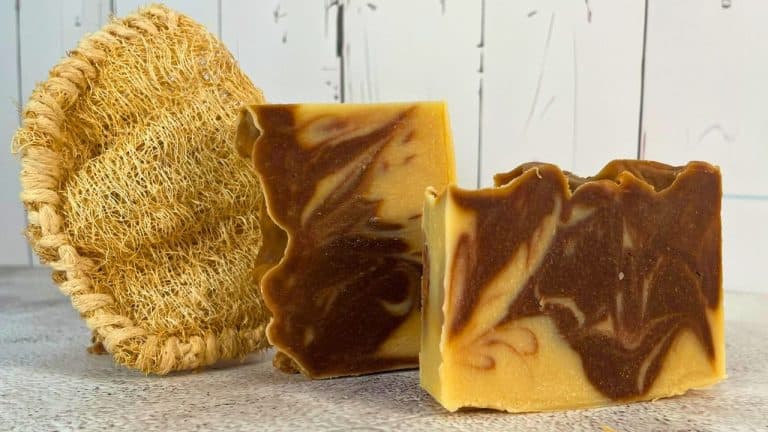
Amazing Rosemary Peppermint Goat’s Milk Soap Recipe Made into Bars

We were so pleased with the first cured soaps that I made, we’re looking at making our own soap for the homestead. As I dive deeper into handmade soap I was looking for a fragrance blend that would be appealing to Philip. It’s important to me to use an essential oil blend rather than artificial fragrance oils, which I found in many recommended “manly” fragrances. It’s also very hard to select a fragrance for the first time without being able to smell it! I opted to try an option I felt was relatively safe, using a cold process soap recipe that used peppermint oil. The peppermint scent of this soap is absolutely amazing and so refreshing!

Ingredients for Rosemary Peppermint Soap
While many soap makers make fancy soaps with natural colorant or peppermint leaves from a peppermint tea bag. I wanted to make a simple natural soap. My natural ingredients list reflects the simplicity of my homemade soap recipe.
- Sodium Hydroxide-Lye
- Powdered Goat Milk
- Olive Oil
- Coconut Oil
- Shea Butter
- Cocoa Butter
- Avocado Oil
- Castor Oil
- Rosemary Essential Oil
- Peppermint Essential Oil
- Powdered Oatmeal

Soap Making Equipment List
For safety reasons, I use dedicated equipment for soap making. It’s also extremely important to use proper safety equipment when making soap. Lye is a caustic chemical that can cause burns.
Safety Gear
- Safety Goggles
- Gloves
- Additionally, soap makers should wear long sleeves, pants, and shoes.
Equipment for Soap Making
- Stainless steel bowls
- Large Bowl for Ice Bath
- Digital Scale
- Digital Thermometer or Infrared Thermometer
- Spatulas
- Stick Blender AKA Immersion Blender
- Soap Mold
- Plastic Container (if using the microwave to melt butters)
- Alcohol in a Spray Bottle
- Containers for Measured Ingredients (canning jars, or plastic bowls)
- Ice cube trays
- Spoon to shape the soap
- Drying Rack
Cold Processed Peppermint Soap Recipe
My original soap making recipe came from Holly at Holly’s Soap Making. This recipe produces a rich lather and a nice balance of butters and oils that nourish the skin. Eventually, I want to begin making soap with fats produced on the homestead, but until that time, this is an easy recipe.
Every batch of soap can be customized for the soap mold that you are using. I use SoapCalc, a free soap calculator, to calculate the exact measurements of the soap ingredients. Soap making is science! It’s important to measure accurately each and every time. Using the percentages from Holly’s Goat’s Milk Soap Recipe, SoapCalc adjusts the recipe exactly to produce the proper amount of soap for my mold. I did overshoot my measurement slightly for my mold. Thankfully the extra soap was poured into round molds that I had on hand. In the future, 825 grams of oil is a better measurement to calculate my soap recipe. The finished recipe produced 41.96 ounces of soap. My mold is a 10x3x2.7 inch mold that holds 42 ounces of soap.

The included recipe below in this post provides instructions better suited for my mold as well as instruction in the Notes section on how to use SoapCalc to adjust the recipe for your mold.
Advance Preparations for Soap Making
Depending on the type of soap you are making, your advanced preparations will vary.
Preparing the Milk
Prior to making cold-process soap that uses milk in the lye water solution, it’s important to prepare the goat’s milk and freeze it into ice cubes. Currently, we don’t have access to fresh goat’s milk so this time I used powdered goat’s milk. This is easy to mix up and produces white milk. Previously I used canned goat’s milk that I purchased in the grocery store. The milk had a yellow tint to it even after diluting it with water. I mix the goat’s milk up in small batches to freeze. Milk is used frozen to prevent the milk from burning when it is mixed with the lye.
I have found that freezing goat’s milk in ice cube trays is very hard on the trays. I have cracked every ice cube tray I have used! The cubes are much harder than regular ice cubes and they don’t slip as much as an ice cube made from water. I have been successful in letting the trays sit out a bit to warm up and running warm water over the bottom of the trays. In the future I want to look at silicone molds that I am hoping will be better for making milk ice cubes.
Ornamental Tea Leaves
If you would like to add dried peppermint leaves to your soap, they need to be prepared in advance. You’ll need 1 teaspoon of peppermint leaves per 8 cups of soap. While you can add fresh herbs directly with no preparation, it’s better to steep the tea leaves for a few minutes in water. Then drain and dry completely. This prevents the peppermint leaves from bleeding into your soap causing discoloration around the leaves. I did not add peppermint leaves to my soap, they are ornamental only, adding texture and color. They don’t add any value to the scent of the soap or for exfoliation. Soap making is an art! Many soap makers go to great lengths to produce unique art.
Oatmeal
I did use oatmeal in my goat’s milk soap. Unlike peppermint leaves, it does add value to the soap. The oatmeal provides gentle exfoliation and is soothing to sensitive skin. You can purchase colloidal oatmeal. Colloidal oatmeal includes the bran of the oats when it is ground and provides extra exfoliation. In oatmeal that is used in cooking, the bran is removed to make it shelf stable.

I have used old-fashioned oats in my soaps. I grind this in the food processor. It can be sifted, however, I use it as is. Oatmeal is added at 1 tablespoon per 500 grams of oil.
Preparing the Workspace
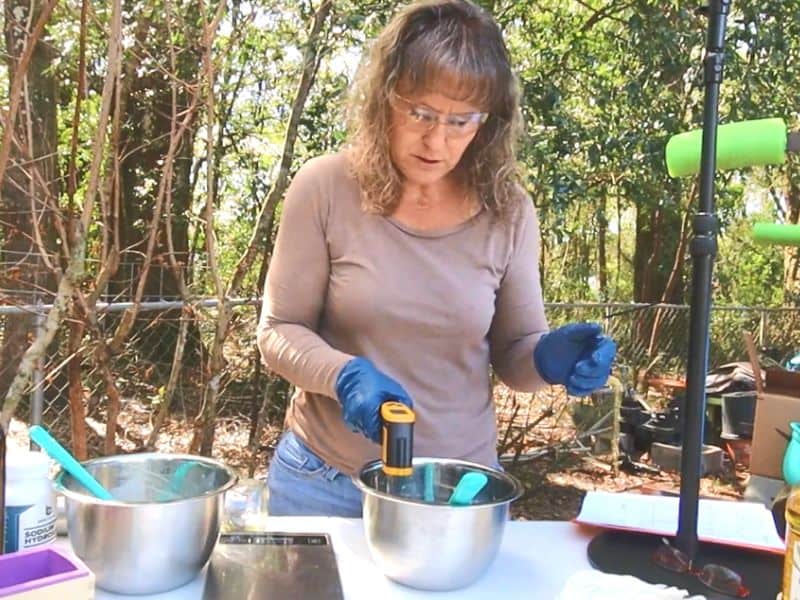
While it is safe to make soap inside, ensure proper ventilation to make a safe place to make soap. Since we live in an RV, I do my soap-making outside. This ensures that my workspace is well-ventilated. Saponification is a chemical reaction created by mixing lye with liquids. This creates fumes that are dangerous to breathe.
It’s best to have everything gathered and set up prior to soap making. I premeasured my essential oils, oatmeal, and any other additives I might be using such as honey. I premix my essential oils, using a 50/50 mix of rosemary and peppermint. Holly from Holly’s Soap Making recommends 4 parts rosemary to 1 part peppermint in her video. The 50/50 blend does overwhelm the rosemary with a minty scent. The best part of soap making, is you decide how to mix your fragrances to your preference. While you could premeasure the oils, I do that as I go. Once everything is ready, it’s time to make soap!
The Lye Step
I begin my soap making by measuring the goat’s milk into my stainless steel bowl. This bowl will be non-reactive to the lye. While you can use plastic bowls, only certain grades are safe to use with lye. Once my milk is measured, I put the stainless steel bowl into an ice bath.
Now it’s time to wear the safety gear. Gloves and eye protection will be necessary for the rest of the soap making. I’m including videos below on lye safety that are published by Bramble Berry. Be aware, the lye mixture will get VERY hot! It can reach temperatures close to 200 degrees.
The next step is to measure the lye. I use a sacrificed mason jar for this purpose. I have marked it with an “X” to distinguish it from my other canning jars. Once measured, begin adding the lye to the goat’s milk in small batches, just a little at a time. Stir with a spatula. Once the milk cubes begin to melt, continue adding lye until it’s added completely. Since you can’t see through the milk, continue stirring much longer than you think you need to. I watch for pieces of lye on the sides of my bowl and spatula for signs that the lye is not yet dissolved. Another trick is to check the temperature of your lye solution. If the temperature is still climbing, the lye is not completely dissolved. Keep mixing. Once you are satisfied that the lye is completely dissolved, set it aside.
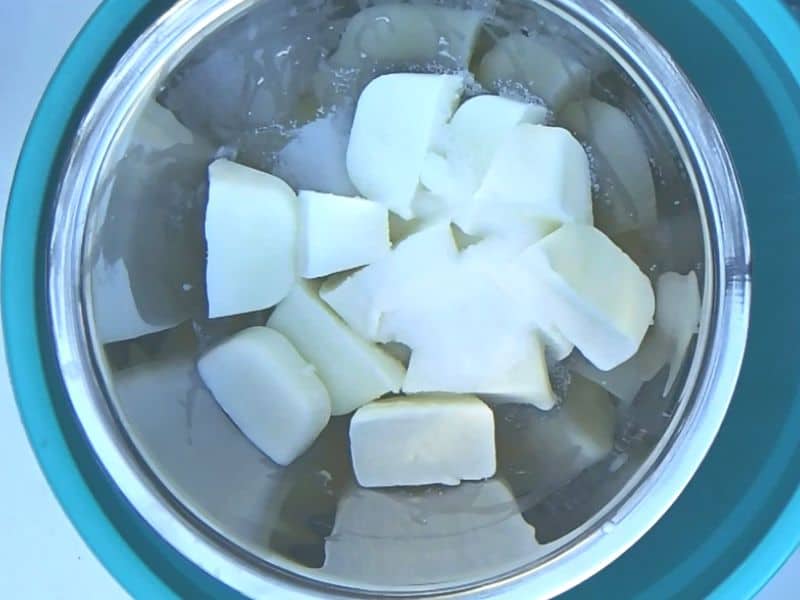
Measuring the Oils
It’s amazing to me that oils are used to make soap! For this step, you will begin measuring the butters and oils in the longest melting order. I purchased a stainless steel bowl for this step so that I could melt my oils in a double burner on the stove, However, I usually use the microwave, so I have to use a plastic bowl. I begin with the cocoa butter, melting the oils until almost melted. Then I add the shea butter followed by the coconut oil. I mix well until completely melted.
Next, I add the liquid oils. Olive oil, avocado oil, and caster oil. I usually measure each one separately because I am not good at measuring precisely. If the oils are separate, I can remove a little if needed.

Once the oils are all measured, mix the oils and butters together, using the stick blender. Be sure to tilt the stick blender in on an angle when putting it into the oils. This helps prevent adding air bubbles to the oils. You should also burp the immersion blender on the bottom by tapping it. Allowing any air at the end of the stick blender to escape. Add oatmeal to the oils and mix well.
It Begins: Saponification
When the lye solution and the oils are mixed they begin to saponify. During saponification, the fats and oils (acids) are transformed into soap when they are combined with the lye mixture (the base). The chemical reaction creates self-generated heat and neutralizes the acids and bases during the process. The end result is soap.
When making milk-based soaps the ideal temperature range for the lye solution and the oils is 75 to 80 degrees. I have struggled with this step. Ensuring that the oils are not too hot can be challenging. At a minimum, the oils and the lye solution should be within 10 to 15 degrees of each other. Once the ingredients are within the optimal temperature range. Add the oils to the lye mixture. Be sure to use a bowl that will be non-reactive to the lye. It’s best to pour the oils over your spatula to prevent too much air from entering the mixture.
Especially when first learning, it’s best to mix in short bursts with the stick blender. Once the ingredients are mixed, use the immersion blender and spatula to bring the soap mixture to trace. Trace indicates the thickness of the soap. Lines will hold their shape when drizzled from the stick blender. If you plan to add a small amount of peppermint to your soap, mix the lye and oils to a light trace. Mix in the dried peppermint leaves.

Continue mixing until medium trace then add the essential oil blend. Be aware that some essential oils can accelerate trace, be prepared to work quickly with your soap.
Pouring the Soap
Once you have reached medium trace it’s time to pour the soap into a mold. Molds come in all kinds of shapes, sizes, and materials. I’ve used silicone molds with great success. While you can pour the soap into individual bar molds, you can also pour a loaf of soap into a large rectangular mold. Once the soap has cured for a short time, you can remove it from the mold and slice it into bars. The disadvantage of using individual molds is the soap will continue to become thicker, making it harder to work with. Using a loaf is easy to pour and fill while the soap is still at a workable trace. Once the soap is poured into the loaf mold, you can shape the top and add decorative additives.

Once you are done with your decorative touches, spray your soap with an alcohol mist to help prevent soap ash from forming on the top.
Cool the Soap
When working with a milk-based soap, it’s important to cool the soap as quickly as possible. Soap continues to go through saponification for quite a while after you pour the soap. As a result, it will continue to heat up and go into gel phase. While gel phase is popular in water-based soaps, in milk-based soaps, the milk can scorch and cause problems with your soap. Place the soap into the freezer for at least 5 hours.
I cautiously place my soap into my fridge and freezer. I’ve read mixed reviews about your food absorbing the fragrance of your soap. Since I don’t have a dedicated fridge for this, I use it cautiously.
To protect the surface of my soap I cover it with plastic wrap then I put the entire mold into a garbage bag in the freezer. After 5 hours, move the soap to the fridge for 2 days, keeping it wrapped up.
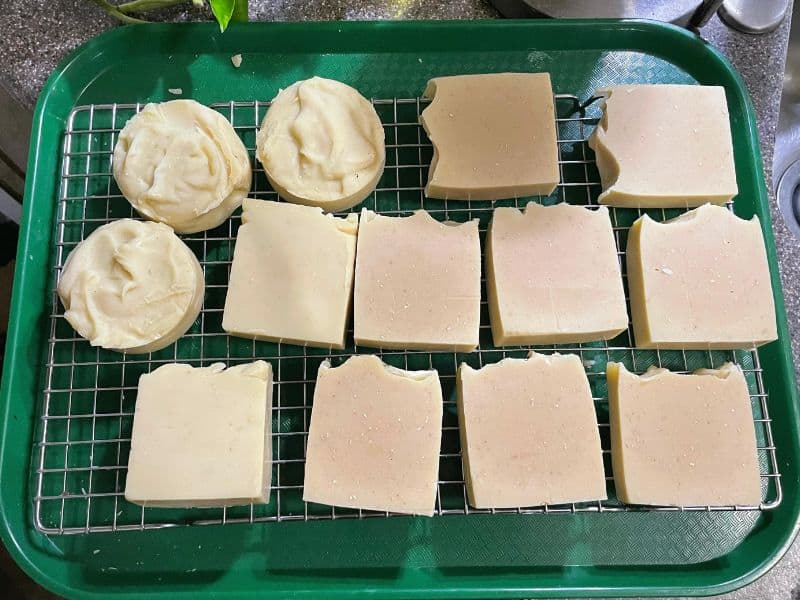
Once cooled, remove the soap from the mold and slice it into bars. Place the cut bars of soap onto a rack that allows for good airflow. I use a baking rack. Place the rack in a safe place away from animals and children where it can cure for 4-6 weeks.
Storing the Soap
Once the soap has fully cured, it can be used for bathing. It still needs to be kept in an area that allows for airflow to prevent dreaded orange spots. Leaving soap in a sealed container or zip-lock bag can cause moisture to make the soap smell off. It may begin to ooze oils.
Soap Making is Addictive
Soap making is really enjoyable and not scary at all! The desire to try different essential oil blends, possibly adding the use of natural colorants and decorative touches adds to the challenge. While soap is a very useful and needed addition to homestead living, it also can be an enjoyable hobby to fill long winter days. On a recent trip, I smelled every homemade bar of soap we found while searching for the next blend we’d like to add to our soap collection!
Shop This Post

Rosemary Peppermint Goat’s Milk Soap
Equipment
- safety equipment googles and gloves
- immersion blender
- 2 stainless steel bowls
- spatula
- containers for measuring
- digital scale
- infrared thermometer
- Soap mold
- double boiler
- ice bowl
Ingredients
- Sodium Hydroxide- Lye 112.13 grams
- Frozen Goat’s Milk 227.66 grams
- Olive Oil 313.50 grams
- Coconut Oil 76 deg 189.75 grams
- Shea Butter 165 grams
- Cocoa Butter 66 grams
- Avocado Oil 49.50 grams
- Castor Oil 41.25 grams
- Oatmeal 1 1/2 tablespoons
- Prepared Peppermint Leaves 1 to 1 1/2 teaspoons peppermint leaves optional
- Fragrance Weight 24.75 grams you will mix them based on your preference. I used a 50/50 mix for my essential oils, mixing the Rosemary essential oil and peppermint oil 12.375 grams each to equal a total of 24.75. I adjusted this from a recommended 4 part rosemary essential oils to 1 part peppermint oil.
Instructions
- Prepare in advance: Freeze goat's milk into ice cubes.
- If you'd like to make your own oatmeal, grind oatmeal in a food processor and sift if you desire. Measure 1 1/2 tablespoon, set aside. Colloidal oatmeal can be purchased instead.
- Mix your fragrance oil. Set aside.
- Prepare an Ice Bath
- Gather all your soap making supplies before beginning. Work in a well ventilated area and be sure to wear the appropriate safety equipment. Gloves, goggles, long sleeves, long pants and shoes.
- Place your stainless steel bowl (or heat safe bowl, NO glass) on your digital scale and tare the weight to zero. Measure your frozen goat's milk. Cubes of goat's milk can be cut to get exact measurement.
- Place your stainless steel bowl into an ice bath bowl.
- At this step, you need to begin wearing your safety equipment, goggles and gloves.
- NOTE: Always tare scale before each measurement.
- Measure lye into a glass container (I use a sacrificed mason jar).
- Keep the bowl with the goat's milk in the ice bath. Add lye in small batches, just a little at a time and stir. WARNING: Mixture will get VERY hot!
- As the goat's milk cubes begin to melt, add more lye, continuing in small batches.
- After all the lye has been added, continue stirring until all the lye is completely dissolved. Stir longer than you think. I look for signs of undissolved lye on the side of my bowl and spatula. Lye is completely dissolved when the temperature is no longer increasing, check the temperature using a digital or infrared thermometer. You can strain the lye mixture through a strainer to remove undissolved lye prior to mixing with oils if you desire. Once lye is completely dissolved, set aside. I remove the bowl from the ice bath at this time.
- Measure oils in order of longest melt time.
- Start with cocoa butter, measure and melt partially.
- Measure and melt shea butter, add to cocoa butter.
- Measure and melt coconut oil, add to other butters. Stir until completely melted.
- Measure olive oil, avocado oil and castor oil and add to melted butters.
- Mix the melted butters and oils completely together. You can use a stick blender. See notes below on how to "burp" the stick blender.
- Add oatmeal to oils and mix well.
- Take the temperature of both mixtures, the lye solution and the oils. The ideal temperature for soap making when using milk is between 75 to 80 degrees. Ideally, the two mixtures should be within 10 to 15 degrees of each other.
- Be sure to use a heat safe bowl at this time. Add the lye mixture to the oils. Pour the lye mixture over the handle of the spatula to lessen air added to the mixture.
- This is where saponification will take place. Using your stick blender and spatula mix the mixture until trace. It's best to use your stick blender in short bursts. This takes time. Just keep mixing. If adding peppermint leaves, mix until light trace. Mix in peppermint leaves and continue mixing until medium trace. Trace is achieved when drizzled soap from the stick blender holds it's shape. Light trace will lightly hold it's shape, medium holds it's shape better, it looks like pudding.
- Once you achieve medium trace, add fragrance oils. Mix well. Be aware fragrances can accelerate trace, be prepared to work quickly.
- Once fragrance is mixed well, add to soap mold. Use a spoon to shape the top. If you want to add any decorative touches to the top, it's time to do it now.
- Spray the soap mixture lightly with alcohol to prevent soda ash.
- Place in freezer for 5 hours
- Move to refrigerator for 2 days.
- Remove soap from mold and cut into bars. Allow the soap to cure on a wire rack where it gets good air flow. Be sure its away from animals and children's for 6 weeks.
- Once the soap is fully cured, it is safe to use.
- NOTES: On the day you are making your soap, continue to wear the safety equipment while you clean your bowls and equipment.
Video
Notes

About the Author: Barbra-Sue Kowalski grew up on a small hobby farm. She was always drawn to farm life, however, she was stuck in an urban life far from her roots. Barbra-Sue was a single mom for 13 years, raising her 3 children on her own. She met Philip in 2018 and they married in 2021. Between the two of them, they have 5 grown children and 7 grandchildren. These empty nesters are following their dreams! As they both turn 50, they are building their off-grid homestead to live the life that they dream about. Learn more about Philip and Barbra-Sue here. Contact them here. To leave a comment on this post, please scroll down.


This recipe looks so simple! I’ve always wanted to try making soap!
I really want to dive into making my own bar soap & this looks so doable! Thank you for sharing!
I’ve only made soap with lye once and I’ve been too nervous to do it again! I think you inspired me to give it another try! Haha
I enjoyred it so much! Not scary at all. I watched a lot of videos before starting.
This is perfect! All of my does will be in milk and I was needing a good recipe, thanks for sharing!
I’m so jealous lol. I have wanted to learn soap making for years, but it just feels like a lot to learn. I’m glad you’re writing it all down so I have a nice easy recipe to follow. Thanks, also, rosemary and mint sounds really delicious.
Absolutely love this soap recipe. The combination of rosemary and peppermint not only sounds delightful but also has potential therapeutic benefits. Thanks for sharing this wonderful DIY idea.
It’s amazing! My favorite blend! Thank you for stopping in.