Easy DIY Tracing Table for Quilting, Crafting & More

If you’ve ever wanted to trace a pattern for a sewing or art project, you likely discovered that a tracing table or light table is pretty expensive for one-time use. However, creating an easy DIY tracing table with items you likely already have on hand will get you back to creating in no time! This easy DIY tracing table is perfect for tracing applique and embroidery quilt designs, helping the kids with art projects, or keeping everyone busy on a rainy day. It’s a versatile tool that the whole family can put to good use.
What is a Tracing Table?
As a quilter, I like to personalize my quilts, but drawing a pattern freehand on fabric can be pretty tricky. Not only does the fabric move, but it can also be hard to properly center, maintain letter sizing, and check your spacing before creating a design. A tracing table, also known as a light table, allows the crafter to trace a design from a printout to fabric or other crafting materials. By providing uniform light from beneath the design, you can easily trace your creative work on the top of the box. For kids, a tracing table allows them to practice their art and provides rainy-day entertainment without the screens.
Why Make a DIY Light Table?
For me, I don’t use a light table often enough to justify the expense. A quality tracing light box can cost over $50 to $200! While there are affordable light table options that might get you by, why store the bulky frame of a light table when you don’t use it often? Light pads are a lightweight design and ultrathin, but still, I like to save money wherever I can!
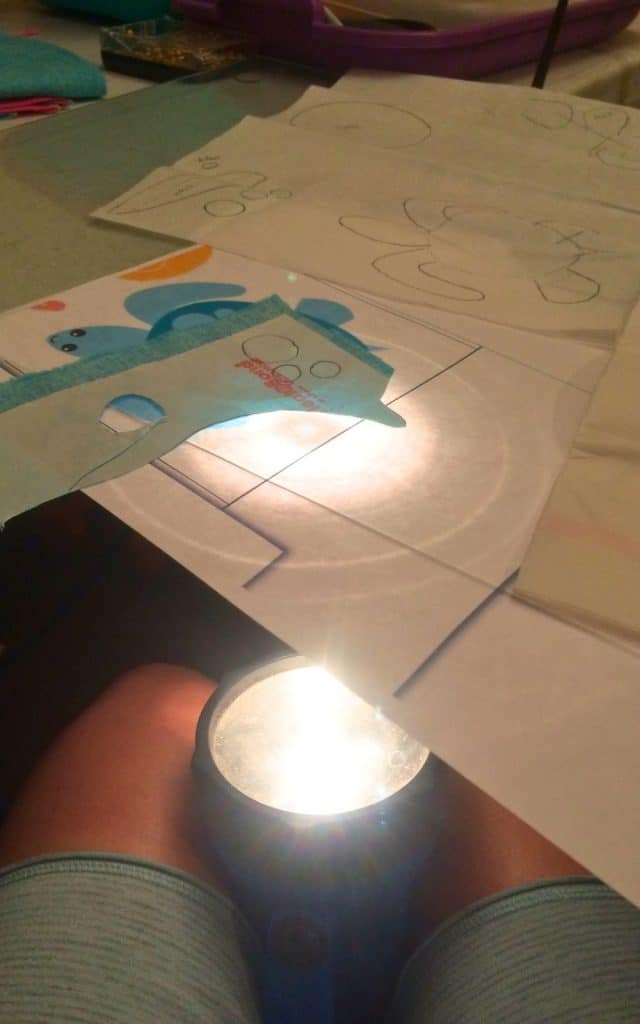
Over the years, I have tried some crazy ideas to trace my quilting designs! The craziest was holding a flashlight between my knees while I traced the main content of my design onto the fabric! While it wasn’t fancy, it didn’t cost me a thing, and I got the job done! Since then, I’ve discovered several DIY solutions that work much better and still cost practically nothing!
My Favorite DIY Tracing Light Table Design
My absolute favorite DIY light table was to use my dining room table. This DIY light table uses the leaf section of the table to create a light table. Pull the table apart, leaving the opening where the table leaf is inserted open. The hard wood frame creates a sturdy surface to work on. Next, add a piece of tempered glass or plexiglass over the leaf opening. I used a piece of glass from a nightstand. The tempered glass is a thick glass that could handle the slight pressure that I might apply while working and it ensured I was safe working on it.
Don’t have a glass-covered table? Look in your refrigerator! The glass shelves in your refrigerator are made of tempered glass. It’s the perfect option that almost everyone has access to! Bonus, they get a good cleaning!
Finally, place a lamp under the table to light the work area! This option takes a little time to set up, but I really like it because I can create a large, stable work area and sit comfortably while I do my tracing.

Other DIY Tracing Table Options
If you don’t have a dining room table that includes a removable leaf section, don’t despair. Get creative; the goal is to create an elevated, clear surface to place a light under. LED lights powered with AAA or AA batteries tend to be small and bright. It makes them perfect for placing beneath your tempered glass. One year, I used two recycled juice bottles to support my refrigerator shelf. While not optimal, it worked!
Next Level Design Perfect for Kids
Looking to create a light tracing table for your kids. Clear plastic totes are the perfect work surface for kids with no worry for mom. Turn the plastic tote upside down, using the clear bottom as the work surface. Place a bright rechargeable battery-operated LED light beneath the plastic tote. Kids can color, draw, and practice writing skills without worrying about toppled glass.
Philip and I live in our RV right now, and my dining room table is in storage. The plastic tote option is really a great choice, even for crafters. Be sure to find a tote with a flat bottom. I used a flashlight to light up my tracing table. A small container can be used to prop the light to aim it towards the work area.
Tips When Tracing on a Light Table
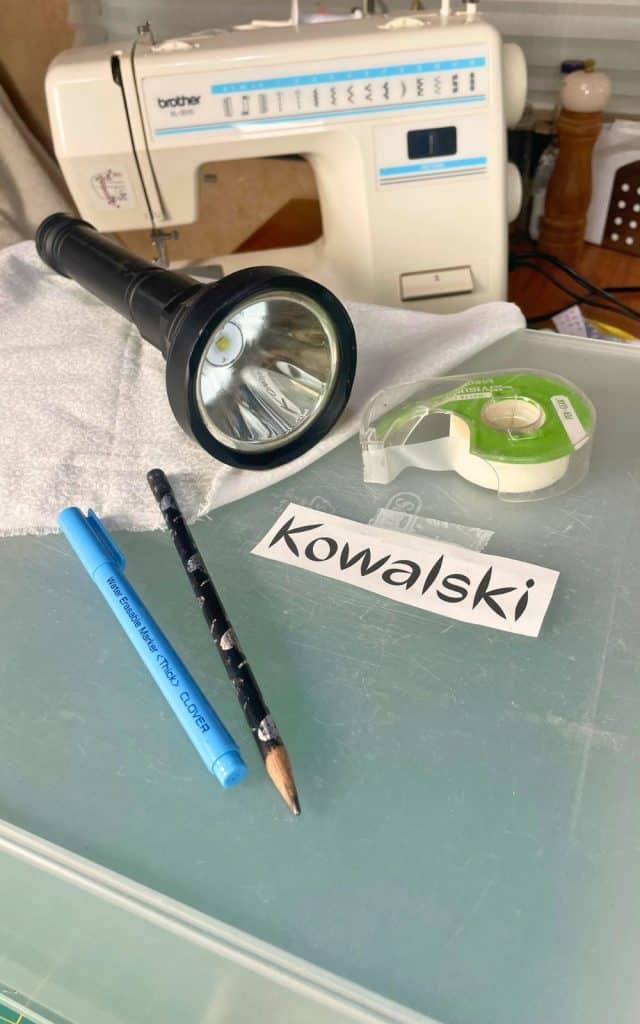
Tape the sheet of paper with your design to the glass. I take it a step further and tape my fabric down, too! It’s so hard to realign a project if you accidentally move it. Tape eliminates frustration.
Use a pencil to trace your design on fabrics. Light pressure and a faint line are usually sufficient on light fabrics. On darker fabrics, try fabric marking pens or chalk. You have two options of marking pens: water-soluble or disappearing ink pens. ALWAYS test the markers on a scrap piece of fabric; they don’t always work! Disappearing ink pens can be a good option for something that will be done quickly, but be cautious, the ink may disappear before you finish, especially if you live in a humid area or your home is more humid from an aquarium.

A Simple DIY Tracing Table That Works
A tracing table doesn’t have to be fancy or expensive to be useful. With a little creativity and a few items you already have at home, you can build a DIY tracing table that works for quilting, crafting, and kids’ art time. These days, I only make baby quilts for new grandbabies! Creating a DIY tracing table with things I have around the house saves me money and frustration with nothing to store for later. Plus, they work!


Find this post helpful?
Share it on Pinterest
FAQ: Your Questions Answered
Tempered glass is stronger and safer. If it breaks, it crumbles into small, rounded pieces instead of sharp shards, making it ideal for crafting and kids’ projects.
Of course! Any clear surface that you can work on.
LED rechargeable lights are youre best option. LED’s have bright, clean light. Rechargeable makes you feel better about using it for a long tracing session.
YES! I use this for fabric all the time! Darker fabrics are harder. Try to aim the light upwards the best you can. White chalk is a good option for tracing your design.
Tape it down! I tape the design and the fabric in place.
YES! The plastic tote method is the best choice for kids! Though I love it too!
YES! Yes, YES! Always test the marker on a scrap piece of fabric that you will be marking on. Detergents or fabric softeners may affect how the markers work. ALWAYS test it first.

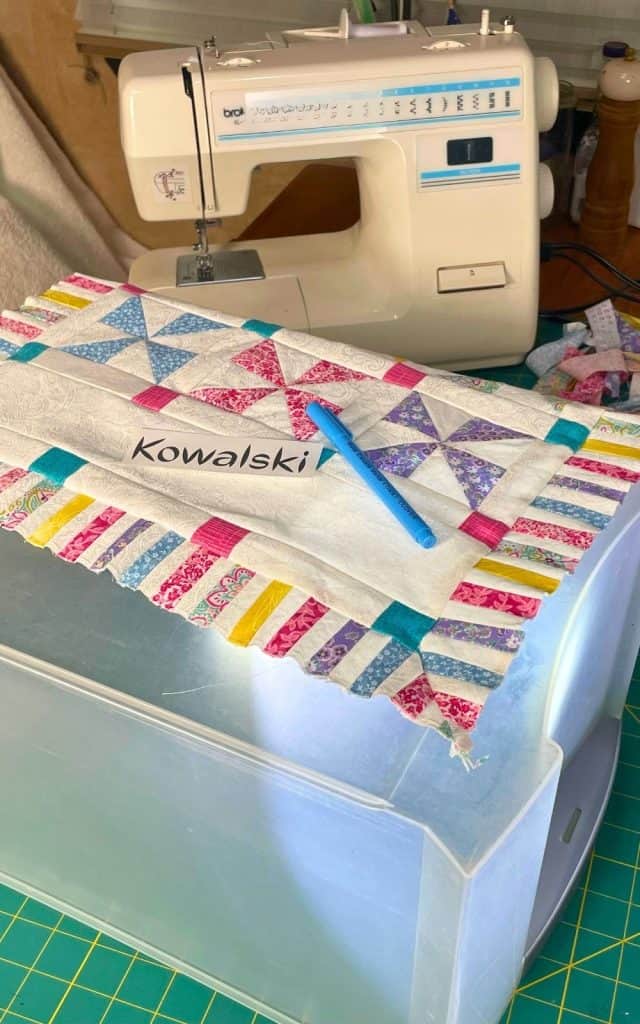
About the Author: Barbra-Sue Kowalski grew up on a small hobby farm. She was always drawn to farm life, however, she was stuck in an urban life far from her roots. Barbra-Sue was a single mom for 13 years, raising her 3 children on her own. She met Philip in 2018 and they married in 2021. Between the two of them, they have 5 grown children and 7 grandchildren. These empty nesters are following their dreams! As they both turn 50, they are building their off-grid homestead to live the life that they dream about. Learn more about Philip and Barbra-Sue here. Contact them here. To leave a comment on this post, please scroll down.


