How to Grind Venison at Home: A Step-By-Step Guide

At our farm, we process all our meat from field to fork. Processing your meat at home is more time-consuming than using a local butcher, but for us, the advantages far exceed the time spent. Philip has spent years studying and practicing butchering techniques. While there is certainly some skill required in identifying muscle groups and getting the most out of the animals you process, if you’re a new hunter don’t be afraid to jump right in and get your hands dirty! Deer processing, like other home butchery, will become easier, the more deer your process. One of the easiest cuts to process is the ground venison. If you are intimidated by the process, it’s a great place to start. Many hunters, remove the backstrap for steaks and grind the rest. This step-by-step tutorial will guide you through the process of how to grind venison at home.

The Best Deer Meat Starts in the Field
Whether you process your meat at home or send it to the butcher, proper handling of wild game starts in the field. It’s imperative to gut the animal and cool the meat as quickly as possible. While not all hunters age their venison, it’s our personal preference to age the meat for 5 to 10 days. Since we don’t have access to a walk-in cooler, we use coolers for this purpose. Depending on the size of the cooler, cut the carcass to fit and ice well. As the ice melts, it’s imperative to drain the meat regularly during the aging process. An easy way is to leave the drains of the cooler open to ensure that the game meat is never soaking in the water.
Advantages of Processing Your Meat at Home
Our top four reasons we process our meat at home.
Knowing the Meat is Yours
Save Money with Home Meat Processing
Set the Standard of Excellence
Waste Not, Want Not

Find this post helpful?
Share it on Pinterest
Lean Meat
Deer meat is one of the leanest meats you will harvest on the homestead. While that certainly helps the waistline, meats that are extremely lean don’t cook as well. Venison burger can end up cooking very dry or worse yet, crumble apart on the grill when cooking. When we are processing ground venison, we add fat to the meat. Since deer fat has a chalky, often gamey taste, we use pork fat or beef fat. If you don’t have a source of fat, contact your local butcher to see if they will save it for you. Often you can purchase it at a very cheap price or even free.
While the amount of fat added is a personal preference you want to add at least 10% of the total pounds of meat. An 80/20 ratio is common, adding 20% fat to the ground venison. If you are making venison sausage, you may want to add up to 30% fat.
For 30 pounds of red meat:
- Add 3 pounds of fat for a 10% mix.
- Add 6 pounds of fat for a 20% mix
- Add 9 pounds of fat for a 30% mix
Note: It’s best to weigh the meat on a kitchen scale rather than estimate.

Preparing the Meat to Grind
The most important thing to do when preparing your meat to grind is to be sure it’s properly trimmed. Philip trims off all the deer fat, all the silver skin, tendons, and any connective tissue.
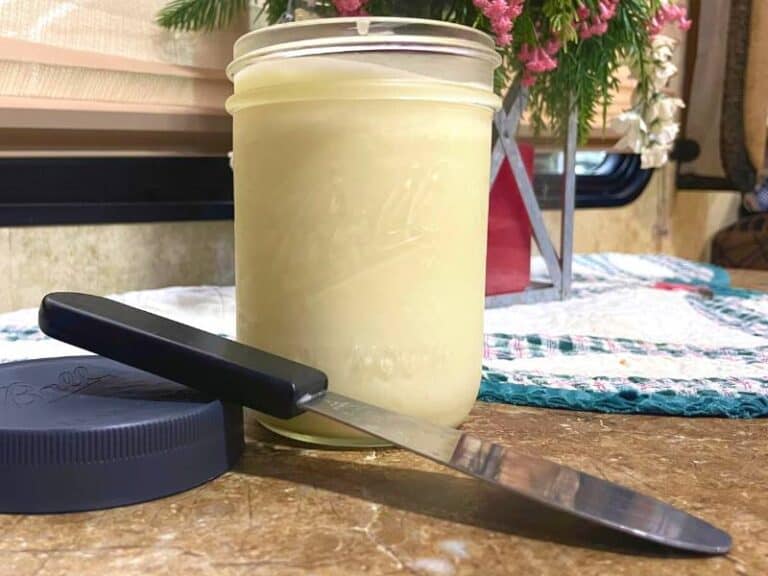
We don’t care for the taste of venison fat, so we trim as much as possible. I like to save all of my deer fat for tallow making that I use to make soap or skin care products.
The connective tissues that connect the muscles to the bones become gristle in the meat when cooked. When it comes to ground venison, it’s important to remove the connective tissue so that you don’t clog and bind the meat-grinding machine.
Remove all the glands. Deer have glands in several parts of their bodies, in the neck, under the front legs, and in the thigh muscles.
Another helpful step is to cut the meat and fat into pieces that will easily fit into your grinder. It’s easiest to do this ahead of time so you don’t have to stop frequently while processing the grind.
Want to learn more about home butchery?
Check out these posts:


Grinding Equipment
Meat grinders come in many styles and price points. While you can purchase a hand grinder to process ground venison, I love our electric grinder! It’s worth every penny and you will still get a good shoulder workout pushing the meat through the machine. For most families, a commercial machine is not necessary. There are several good machines at an affordable price on the market designed for the home processor. Even though we process all our meat on the homestead, we only use a meat grinder a few times a year. Some machines have adjustable speeds and a reverse feature, however, for as much as we use it, a basic machine gets the job done.
Pro Tip: Use plastic wrap to cover the buttons of your machine. Likely your hands will get messy throughout the job. Covering the switches before starting helps make clean up a snap!

A Word About Grinding Attachments
The Kitchenaid mixer has a meat grinder attachment, but I prefer a designated meat grinder for our meat processing. Processing ground meat is hard on the motor of my mixer for such a big job. Additionally, the design of add-on attachments puts pressure on parts of the machines that over time can damage the machine or attachments. For example, a mixer places an attachment on the head of the mixer, which means that you will be putting constant pressure on the front of the machine. I have cracked my cheese-grating attachments just using them as intended due to the design.
Torn Between the Two Options
If you are trying to decide between a designated meat grinder or a grinding attachment consider how you plan to use it. We like to grind all of our meat at once. During hunting season, we freeze the prepared meat until hunting season is over and process all of the ground meat at one time. That may mean we are grinding over 50 pounds of meat at once. For us, a designated meat grinder is best to tackle this big job.
If you prefer to grind your ground venison fresh, doing small batches of one to two pounds then a grinding attachment might better meet your needs. They are small and easier to clean than a dedicated machine.

Our Favorite Home Processing Tools
The right tools make the job so much easier! Check out our favorites in our Amazon shop!
The Grinding Plate
Most meat grinders come with multiple grinding plates. Venison is a softer meat, unlike ground beef which holds its texture a bit more. For that reason, we grind using a medium plate or large plate. The fine plate will cut the meat much too small making the final product gummy.
If you are making sausage using a meat grinder with a sausage stuffer attachment, keep in mind that the meat will be put through the machine twice. The first grind for grinding the meat and the second is to stuff the sausages. When doing a double grind, it’s a good idea to use a more coarse grinding plate to ensure the meat is not over-processed.

Processing the Ground Meat
When you are ready to start processing your ground meat, make sure the meat and fat are cut, cleaned, and ready for processing. If you have frozen your meat before processing, make sure it is mostly thawed. While it can be partially thawed, frozen meat can damage your machine. Partially frozen fat is helpful when grinding meat as it’s less likely to gum up your machine, however, freezing the fat is optional.
Some home processors like to put the grinding attachments into the freezer before getting started to ensure everything stays very cold. We have not found that necessary. When the meat is properly prepared, the process is relatively quick.
If mixing fat into the venison meat, we mix as we go. For every few handfuls of meat, you push through the meat grinder add a little fat as well.
We grind our meat into meat lugs. These large tubs have plenty of room to grind larger batches of meat and mix the fat thoroughly. Once the meat and fat pass through the grinder, we use tongs to continue to mix the fat evenly throughout the meat.
See the full step by step video tutorial
Freezing the Meat
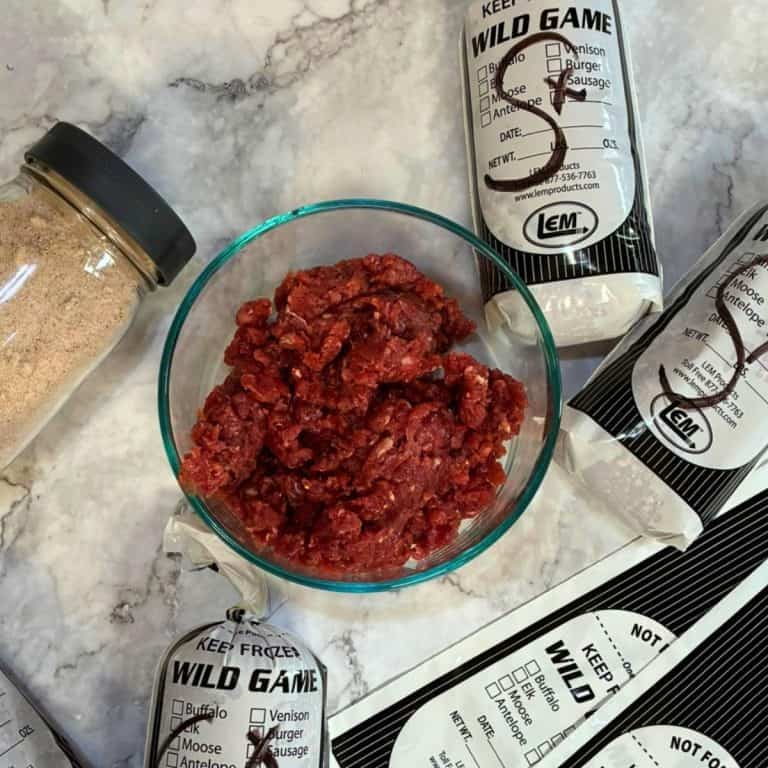
If you grind large batches of meat you will want to package the meat properly for long-term storage. It’s best to package the meat in measured amounts that you use most frequently. For ground meat, we use game bags for one and 2-pound packages. These bags make it easy to package small amounts and remove the air from the bags to best prevent freezer burn.

Some people use quart freezer bags. These are easily accessible and work well. I prefer the zipper bags over the slider bags because I feel like they seal better. Another option is vacuum sealer bags. While we have used these, they are more expensive and require a specialized piece of equipment to seal. Philip also finds that when tossed around in the freezer, while looking for your favorite cuts, they can get dinged, allowing air to enter the bag and create freezer burn.
Pro Tip: Always label and date your meat! Trust me, it’s hard to tell after the meat is frozen.
If you are expecting to store the meat for a very long time, freezer paper can add an extra layer of protection for your meat. We use paper grocery bags available at local grocery stores to organize the meat in our chest freezer. These paper bags add sufficient protection for our meat.
Processing Your Venison
Processing your meat at home is more labor-intensive than dropping your meat off at the local processor. But knowing how to grind venison at home means that your meat is processed exactly how you want it, that every usable portion of the meat is used and the cost savings make it worth the extra effort!

About the Author: Barbra-Sue Kowalski grew up on a small hobby farm. She was always drawn to farm life, however, she was stuck in an urban life far from her roots. Barbra-Sue was a single mom for 13 years, raising her 3 children on her own. She met Philip in 2018 and they married in 2021. Between the two of them, they have 5 grown children and 7 grandchildren. These empty nesters are following their dreams! As they both turn 50, they are building their off-grid homestead to live the life that they dream about. Learn more about Philip and Barbra-Sue here. Contact them here. To leave a comment on this post, please scroll down.


3 Comments